Tri-tip doesn’t have to be intimidating. Get a deeply seasoned crust, a juicy medium-rare center, and step-by-step grill or oven directions—plus how to slice...
Delishing
How to Trim a Tri-Tip

Maya Brooks
Maya Brooks is a dedicated home cook and the lead recipe developer at Delishing, where she shares practical, foolproof meals for everyday life. With over a decade of hands-on kitchen experience, she specializes in creating approachable dishes that fit a variety of dietary needs and modern cooking methods. Maya is passionate about helping busy people get delicious, stress-free food on the table without needing formal culinary training.
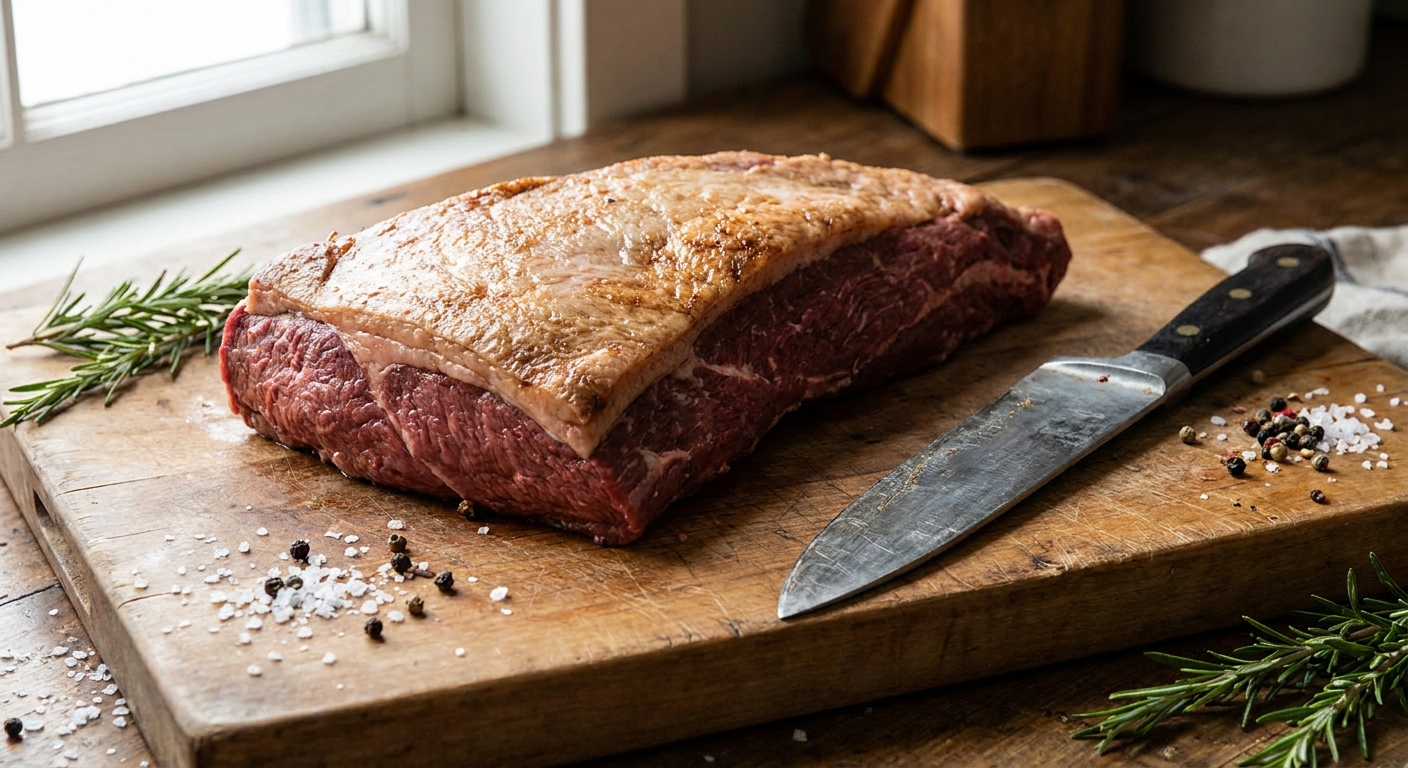
Tri-tip is one of my favorite “looks fancy, acts easy” cuts. The only part that can feel intimidating is the first five minutes, when you unwrap it and realize it is not always the neat, trimmed roast you see in recipes. The good news: trimming a tri-tip is mostly about three things, the fat cap, a fat pocket along the seam, and any silver skin. Once you know what you are looking at, it is quick and very doable.
What you are trimming
When you trim tri-tip, you are not trying to sculpt it into perfection. You are simply setting yourself up for better seasoning and a cleaner bite.
- Fat cap: the broad layer of white fat covering one side. It can protect the meat and help with browning, but too much prevents seasoning from reaching the surface and can leave you with thick, waxy pieces after cooking.
- Seam fat pocket: a thicker, softer area of fat that often runs along a natural seam. This is the stuff that rarely renders pleasantly. It is the first place I reach for my knife.
- Silver skin: shiny, tight connective tissue. It does not break down like fat. If you leave it, it tightens as it cooks and can make slices feel chewy.
If you want to cook tri-tip after trimming, head over to my tri-tip roast guide. If you are still choosing between packages at the store, tri-tip vs top sirloin can help you identify cuts and decide what makes sense for your plan.
Tools for trimming
You do not need a butcher setup. I trim tri-tip with a very small kit.
- Sharp knife: A boning knife is ideal, but a sharp chef’s knife works fine.
- Cutting board: Choose one that will not slide. Put a damp paper towel under it if needed.
- Paper towels: Patting the surface dry makes the meat less slippery and your cuts more controlled.
- Trash bowl: A small bowl for trimmings keeps your workspace calm and clean.
Safety note: Keep your non-knife hand on top of the meat, fingers lifted, and cut away from your hand. Slow is fast here.
How much fat to leave
If you plan on a hard sear, you want some fat, just not a thick blanket.
- Leave on: about 1/8 to 1/4 inch of the fat cap, especially if it is even and clean.
- Trim down: any areas thicker than 1/4 inch, and any spots that look ragged, yellowed, or lumpy.
- Remove completely: dense seam fat and silver skin, even if you like a fattier bite.
My personal rule from years of testing: thin fat can be delicious, thick fat is usually just in the way.
Step-by-step trimming
Set your tri-tip on the board and take a second to look for the three targets: fat cap, seam fat pocket, silver skin.
1) Pat dry and position
Pat the surface dry with paper towels. Start with the fat cap facing up. You will get cleaner, safer cuts.
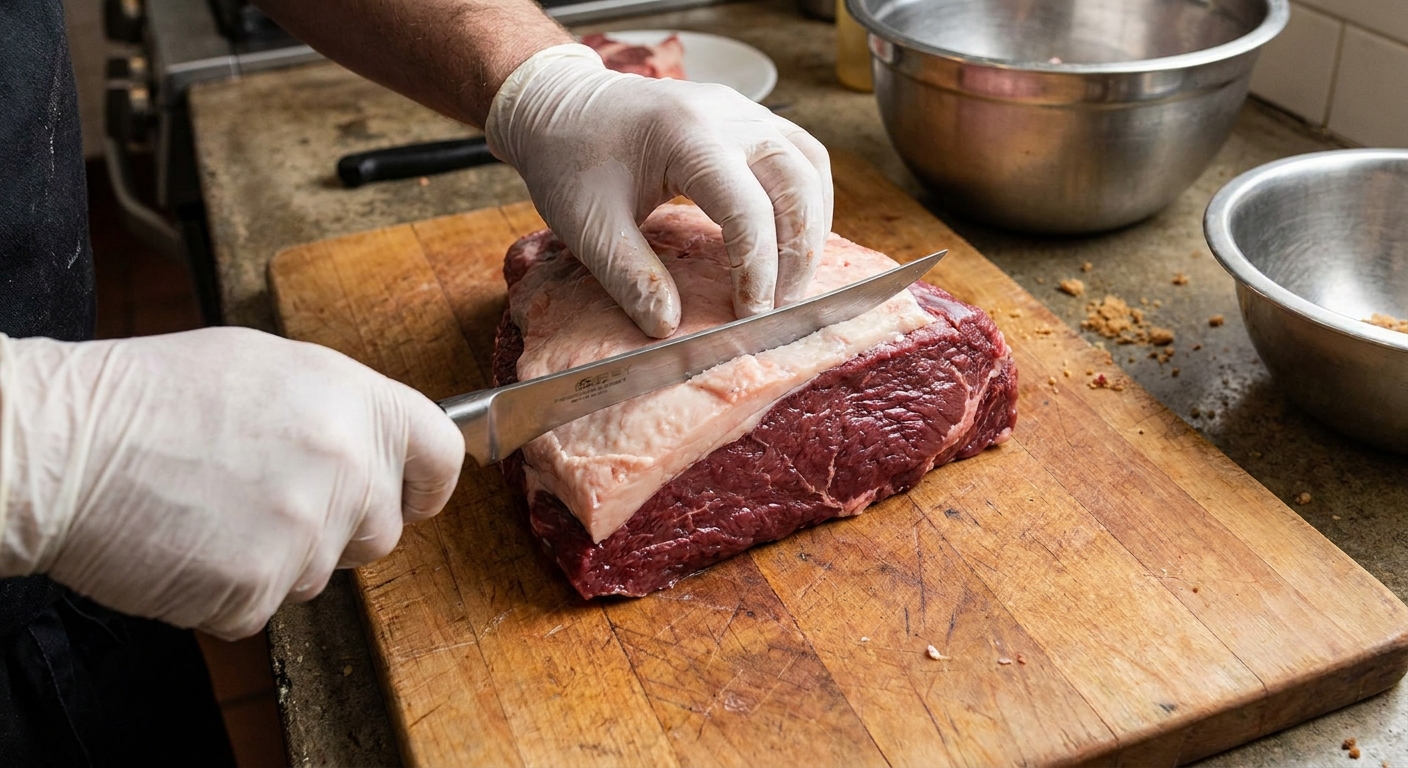
2) Even out the fat cap
Use long, shallow strokes, almost parallel to the meat, to shave off only the thickest areas.
- Grip the fat lightly with your non-knife hand to create tension.
- Angle the blade so you are shaving, not digging.
- Stop when the fat looks mostly even, not when it looks “butcher shop perfect.”
3) Remove the seam fat pocket
Flip and rotate the tri-tip until you spot the thicker, softer fat along a seam. Sometimes it looks like a wedge or a vein of fat that runs into the meat.
To remove it:
- Make a small starter cut at one edge of the pocket.
- Lift the fat slightly to create tension.
- Use short strokes to separate fat from meat, following the natural seam. Let the seam guide you.
This is the trimming step that most improves the final texture, in my experience. It is also the step that helps seasoning actually touch meat instead of sitting on a slick layer of fat.
4) Remove silver skin
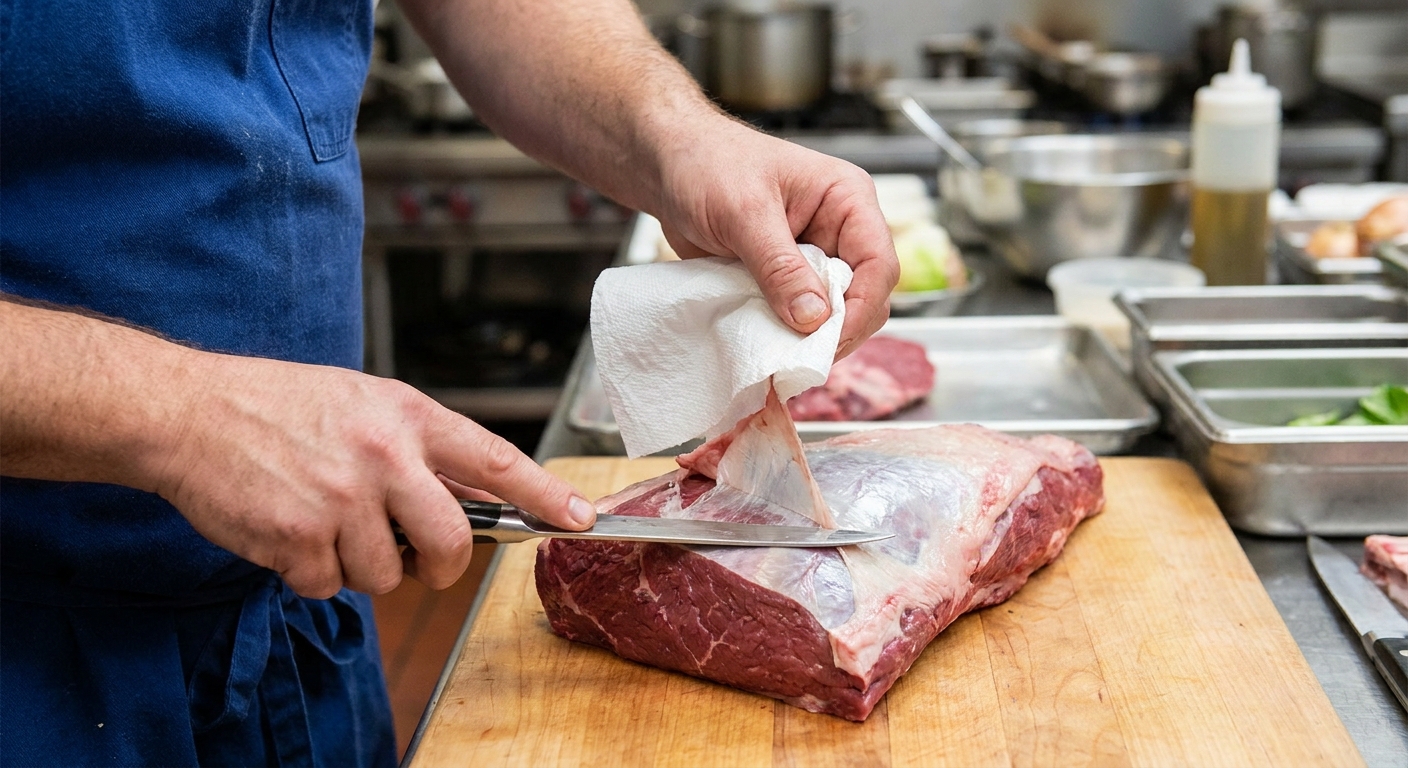
Silver skin is that shiny, silvery membrane that looks tight and smooth. It is slippery, so here is what I do at home: I grab it with a paper towel.
- Slide the knife tip under one end of the silver skin to create a small flap.
- Grab that flap with a paper towel.
- Angle the blade slightly upward and pull the silver skin back while you gently saw forward. You want the knife to skim right under the membrane.
If you remove a little meat along with it, do not stress. The goal is a better bite, not zero waste.
5) Tidy edges and stop
Look for:
- Loose flaps of fat that will just burn or fall off.
- Any remaining shiny silver skin patches.
- Extra thick fat ridges.
Then stop trimming. Tri-tip is naturally an uneven, triangular roast. Over-trimming is the fastest way to make it cook unevenly later.
Before you season
Here is the quick checklist I use right before I season:
- Remove: silver skin, dense seam fat, thick hard knobs of fat.
- Keep: a thin, even layer of the fat cap for flavor and browning.
- Optional: If the fat cap is already thin and clean, you can leave it mostly alone and just focus on seam fat and silver skin.
Once trimmed, you are ready for seasoning and cooking. If you want the full cook method, start at Tri-Tip Roast, or if you are using an air fryer, see Air Fryer Tri-Tip.
Common mistakes
- Taking off all the fat: Tri-tip is flavorful, but a totally naked roast can eat a little drier. Leave a thin layer for a better sear.
- Ignoring seam fat: This is the fat most likely to stay chewy. Prioritize it.
- Trying to remove silver skin with one big yank: It tends to tear. Work in sections.
- Cutting straight down into the meat: Shave with the blade nearly flat. Think “skim,” not “chop.”
- Trimming while the meat is wet: Pat it dry. Slippery meat leads to sloppy cuts.
FAQ
Do I need to trim tri-tip if it says “trimmed” on the package?
Usually it means the fat cap has been reduced, but I still check for seam fat and silver skin. Even “trimmed” tri-tip can have a little pocket that is worth removing.
Should I score the fat cap?
You can score a thick fat cap with shallow cuts if you want seasoning to adhere a bit better. If the fat is already thin, scoring is not necessary and can make you lose juices during cooking.
Can I trim tri-tip ahead of time?
Yes. Trim, pat dry, and keep it refrigerated until you are ready to season. If the surface looks wet later, pat dry again before seasoning so everything sticks well.
What if my tri-tip has almost no fat cap?
That is fine. Just remove any silver skin and obvious seam fat. A leaner tri-tip can still be tender and flavorful with good seasoning and careful slicing against the grain.