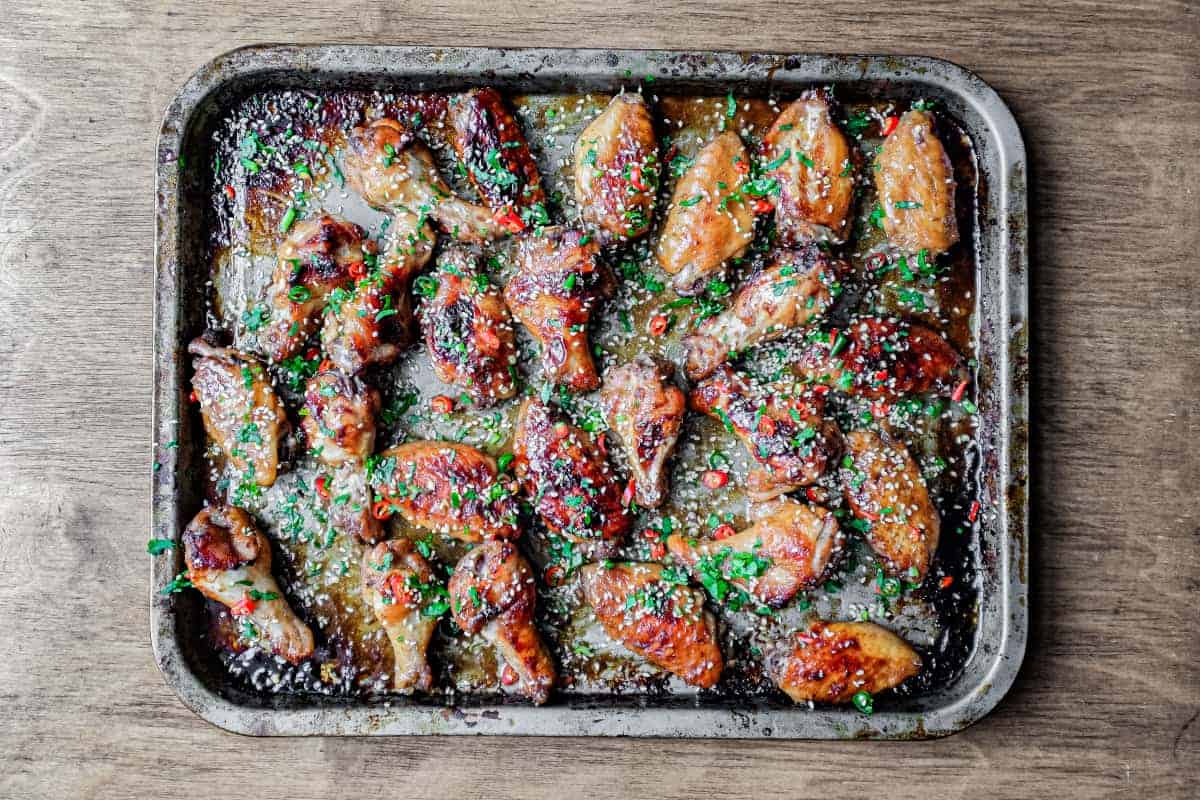
Get sports-bar crispy wings at home—no fryer required. This oven method uses dry skin, a light baking powder dusting, and a two-stage bake for crackly results.
Delishing
Pork Belly Recipes

Maya Brooks
Maya Brooks is a dedicated home cook and the lead recipe developer at Delishing, where she shares practical, foolproof meals for everyday life. With over a decade of hands-on kitchen experience, she specializes in creating approachable dishes that fit a variety of dietary needs and modern cooking methods. Maya is passionate about helping busy people get delicious, stress-free food on the table without needing formal culinary training.
The pork belly problem I kept having
Pork belly is the kind of cut that can make you feel like a kitchen genius or like you accidentally bought a very expensive, very stubborn piece of meat. My early attempts were either: gorgeous tender meat with rubbery skin, or crackly skin with meat that felt a little dry and tight.
What finally made it predictable for me was treating the skin like its own project. The meat needs slow time to render and soften. The skin needs dryness, salt at the right moment, and a blast of heat at the end.
Below is my go-to crispy oven pork belly method, plus two variations I use all the time: a braise (nearly impossible to mess up) and a sliced weeknight cut that cooks faster.
Crispy oven pork belly
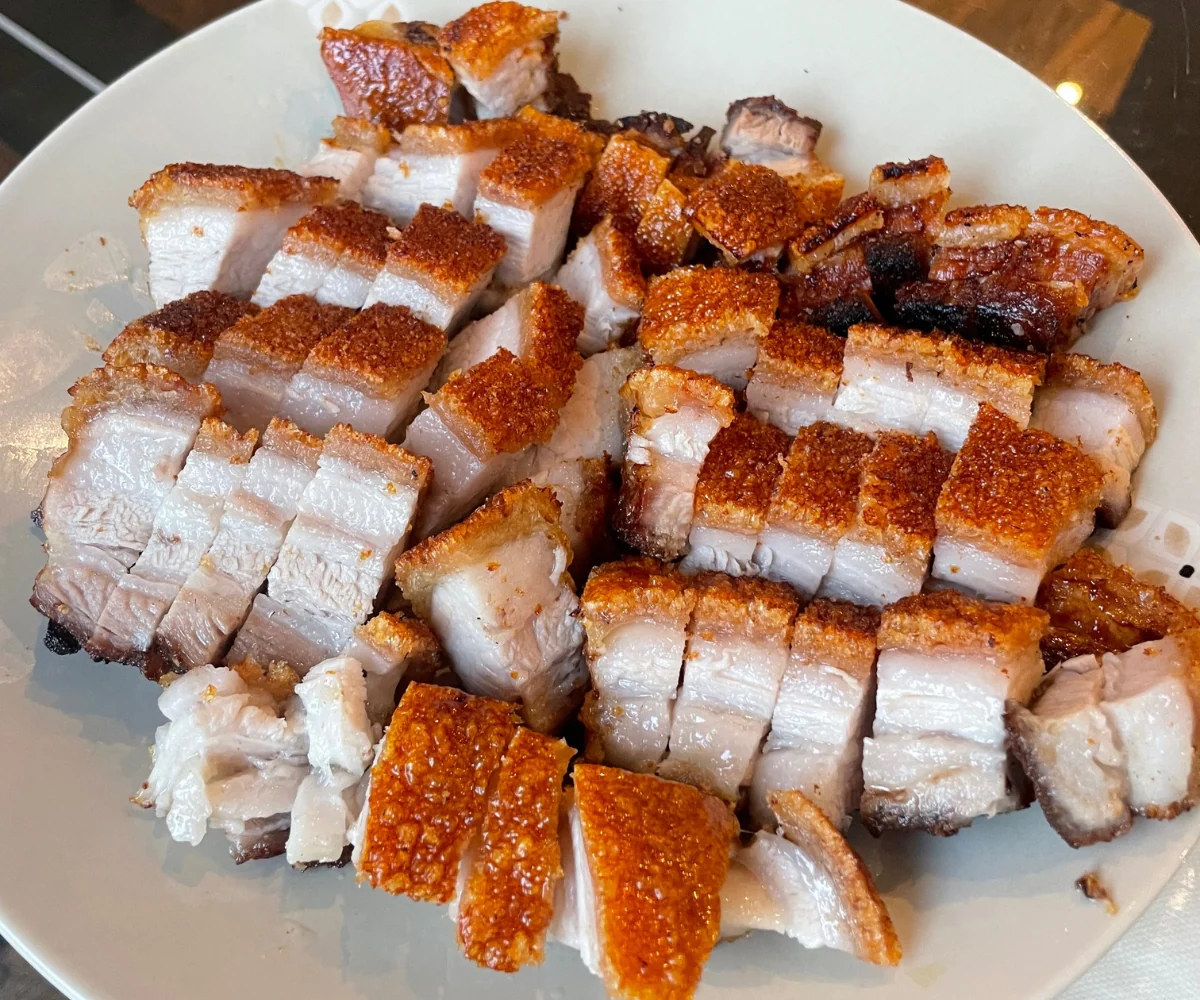
This is the method I reach for when I want true crackling and neat slices. It is not pulled pork, and it should not shred. The goal is tender, rich meat with a crisp, blistered top and clean sliceable layers.
Time and servings
- Total time: about 2 to 3 hours, plus an optional 8 to 24 hours of uncovered fridge drying
- Servings: roughly 4 to 6 (depending on how enthusiastic everyone is)
What to buy
- Skin-on pork belly if you want crackling. Ask for a rectangular slab, 1 1/2 to 2 inches thick if possible.
- If you can only find skinless, jump to the “Sliced weeknight pork belly” variation. You can still get great browning, just not crackling.
Tools that make this easier
- Rimmed baking sheet or roasting pan
- Wire rack (optional but helpful for airflow)
- Sharp utility knife or razor for scoring
- Paper towels
- Instant-read thermometer (strongly recommended)
Ingredients (base method)
- 2 to 3 pounds skin-on pork belly
- Kosher salt
- Freshly ground black pepper (for the meat side only)
- Optional aromatics in the pan: sliced onion, garlic cloves, or thick-cut carrots
Step 1: Dry the skin like you mean it
Pat the skin very dry with paper towels. If you have time, place the pork belly uncovered in the fridge on a rack over a sheet pan for 8 to 24 hours. This air-drying step is the difference between “kind of crisp” and “audibly crackly.”
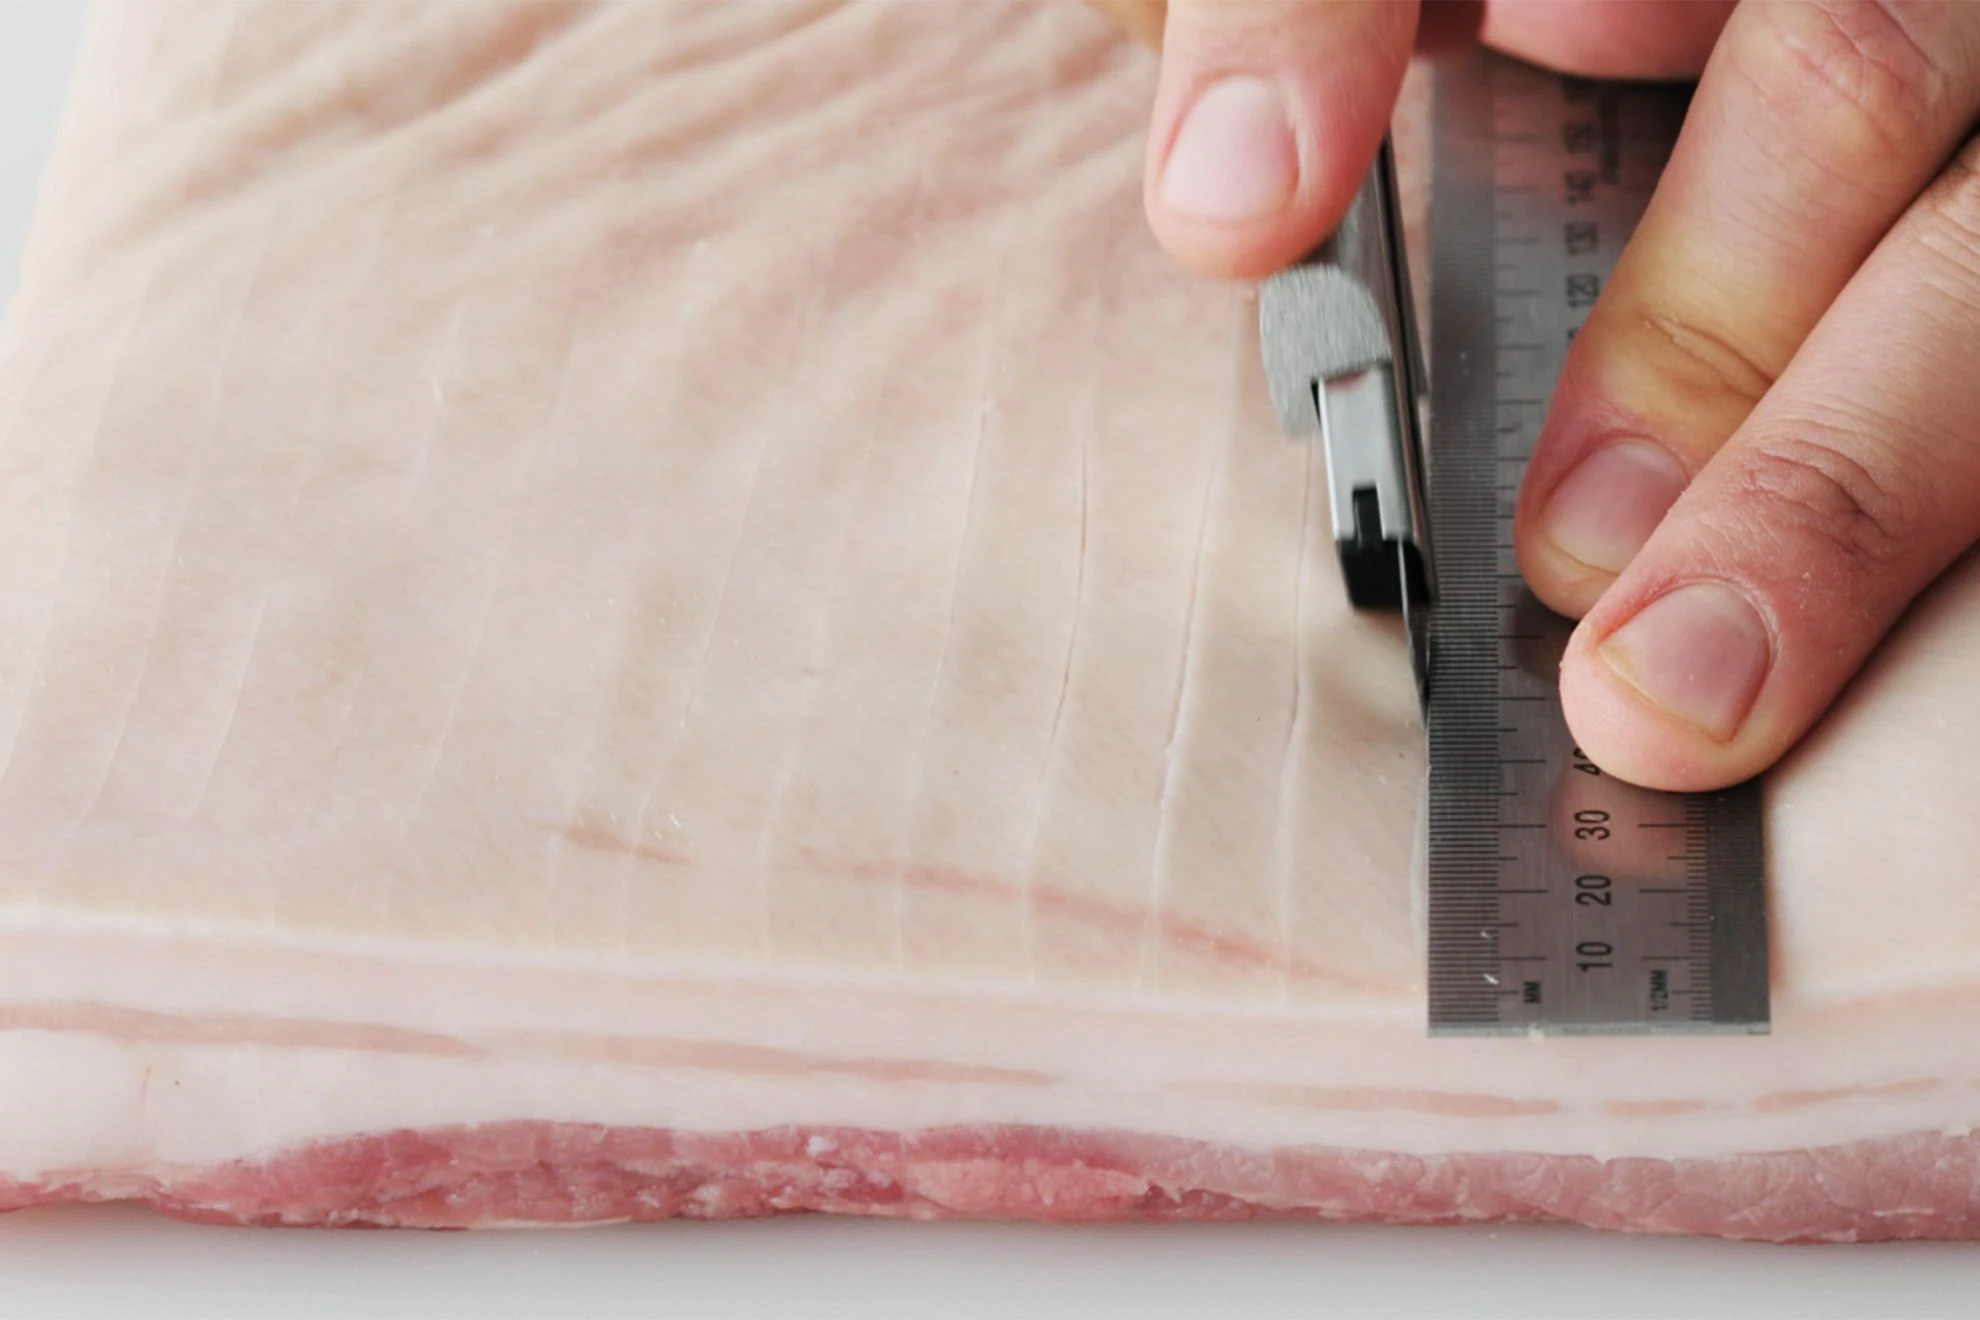
Step 2: Score the skin (do not cut into the meat)
With the belly skin-side up, use a sharp knife to score the skin in straight lines about 1/4 to 1/2 inch apart. Cut through the skin and just barely into the fat, but do not cut down into the meat. If you pierce into the meat, juices can wick up and fight your crackling.
Want to crosshatch instead of straight lines? Totally fine. The important part is shallow, clean cuts and no trips into the meat.
If you are nervous, chill the pork belly for 20 to 30 minutes first. Firmer fat is easier to score cleanly.
Step 3: Salt timing (what works best for me)
My most consistent results come from salting the skin right before it goes into the oven. Salt pulls moisture to the surface. If you salt far in advance, you can still get great crackling, but only if the skin stays uncovered so that moisture can evaporate and you re-blot it as needed.
So I do this:
- Optional overnight dry-out: uncovered in the fridge. You can do it with no salt (my preference), or with a light shower of salt if you know you will keep it uncovered and blot any moisture that beads up.
- Right before roasting: pat the skin dry again, then salt the skin generously and evenly.
Season the meat side with salt and pepper (and any spices you love) whenever you want, even the night before. It is the skin that is picky.
Step 4: The low-then-high heat plan
Keep the pork belly skin-side up the whole time.
1) Slow render: Heat oven to 300°F. Place pork belly on a rack set over a rimmed baking sheet (recommended), or directly in a roasting pan. If using aromatics, put them in the pan under the rack so they flavor the drippings without propping the belly up unevenly. Roast for 1 hour 30 minutes to 2 hours, depending on thickness. You are looking for softened fat and a tender feel when you press the side with tongs.
2) Crackling blast: Increase oven to 450°F and roast 20 to 35 minutes, watching closely near the end. The skin will puff and blister.
If your oven is a little uneven (mine can be), rotate the pan halfway through the high-heat phase. If one stubborn patch still will not blister, you can finish under the broiler for 1 to 3 minutes, but do not walk away. Crackling goes from perfect to scorched fast.
How to tell the skin is truly crackling
- Visual: the skin looks bubbled and blistered, not just browned.
- Sound: you can hear faint crackling as it finishes, and it sounds crisp when tapped with a knife.
- Touch: once rested, the skin feels hard and crisp, not flexible.
Temperature targets
Pork is considered safe at 145°F with a rest, but pork belly is all about texture. For sliceable tenderness and properly rendered fat, I aim for an internal temperature of 190°F to 200°F in the thickest part of the meat. That is the range where it turns silky instead of springy.
Rest, then slice
Rest 15 to 20 minutes. I rest it uncovered, or very loosely tented, so steam does not soften the skin. Slice with a sharp knife. If the skin is very crackly, a gentle sawing motion helps you avoid shattering the crackling off the top.
Easy serving ideas
- Serve with roasted vegetables. I love a tray of crispy sprouts alongside it. If you want a simple side idea, see Roasted Brussels Sprouts.
- Serve over rice with quick cucumbers and a drizzle of soy and lime.
- Slice and tuck into warm tortillas with slaw for a rich, punchy dinner.
Flavor options
The key is keeping the skin simple and dry. Put your big flavors on the meat side or in a finishing sauce.
Option 1: Salt and pepper
Salt the skin generously. Season the meat side with salt, pepper, and a little garlic powder.
Option 2: Five-spice and soy
Rub the meat side with five-spice powder, a small splash of soy sauce, and a touch of brown sugar. Keep the skin dry and salted only.
Option 3: Lemon and herb
Rub the meat side with minced garlic, lemon zest, rosemary, and black pepper. Again, keep the skin dry and salted right before roasting.
Variations
1) Braised pork belly
If you want pork belly that practically melts and you do not care about crackling, braising is the stress-free path. This is also the best move for skinless pork belly.
How I do it:
- Heat oven to 325°F.
- Cut pork belly into large chunks (about 2-inch pieces).
- Sear in a Dutch oven until browned on a couple sides.
- Add aromatics (onion, garlic, ginger if you like), then add braising liquid to come about halfway up the meat. Good options: chicken stock with a splash of soy, or stock with apple cider.
- Cover and braise 2 1/2 to 3 hours, until very tender.
- Optional: uncover for the last 20 to 30 minutes to reduce the liquid into a glossy sauce.
For another comfort-forward slow-cooked vibe on your table, you might also like The Coziest Oven Pot Roast.
2) Sliced weeknight pork belly
When it is 5:00 PM and I want pork belly without committing to a long roast, I slice it before cooking. You will not get the dramatic crackling slab, but you will get crisp edges and rich, tender bites.
Method:
- Slice pork belly into 1/4-inch strips.
- Season with salt and pepper. Add a pinch of smoked paprika or chili flakes if you want.
- Cook in a skillet over medium heat, turning occasionally, until browned and tender, 12 to 18 minutes depending on thickness and starting temperature. You are looking for golden-brown edges, translucent rendered fat, and meat that feels tender when pierced with a fork.
- Carefully drain excess fat as needed (it can splatter). Then finish with a splash of soy sauce and a squeeze of lime, or toss with warm honey and chili flakes.
Serve it in bowls, salads, or tucked into sandwiches. For a sandwich night, pair with something crisp and fresh like the flavors in our Avocado BLT, swapping the bacon for your pork belly strips.
Common mistakes
Mistake: The skin is chewy
- Cause: skin was wet, not scored enough, or did not get enough high heat.
- Fix: pat dry, increase heat to 450°F, and give it more time. Rotate the pan to hit hotter zones in your oven. For extra stubborn spots, a very brief broiler finish can help, but watch it constantly.
Mistake: The skin tastes too salty
- Cause: salt was piled into deep score lines.
- Fix: next time, use an even shower of kosher salt, then gently tap the belly to knock excess off before roasting.
Mistake: The meat feels tight and dry
- Cause: the low-temp phase was too short, or the belly was leaner than expected.
- Fix: cook longer at 300°F to render more fat and aim closer to 190°F to 200°F for that soft texture.
Mistake: Smoke everywhere
- Cause: rendered fat smoking on a very hot pan.
- Fix: use a rack so the belly sits above the drippings. If you still get a smoky situation, add a small splash of water (about 1/4 to 1/2 cup) to the bottom of the pan during the high-heat phase, making sure it does not touch the pork. It can slightly slow blistering, but it helps keep drippings from scorching.
Storage and reheating
Storing
Cool completely, then refrigerate in an airtight container for up to 4 days. Pork belly is rich, so I like storing it in slices. It reheats more evenly.
Reheating
- Oven: 375°F on a rack over a sheet pan until warmed through, 10 to 15 minutes. This is best for re-crisping the skin.
- Skillet: medium heat, especially for sliced weeknight pork belly. Start in a dry pan and let the fat render as it warms.
- Microwave: works in a pinch, but the skin will soften. If you microwave, follow with a quick skillet crisp.
Pork belly FAQ
Is pork belly the same as bacon?
Not exactly. Bacon is usually pork belly that has been cured (and often smoked). Pork belly is fresh, uncured meat with fat layers. You can season and cook it in many styles, from crisp-roasted to braised.
Do I need skin-on pork belly for crackling?
Yes. The crackling is the skin. You can still make delicious pork belly without skin, but you will be going for browned edges, not blistered crackling.
Can I make crispy pork belly ahead?
You can cook it ahead, but the skin is crispiest the day it is roasted. If you want to plan ahead, roast earlier in the day, let it sit uncovered at room temperature for up to 1 hour, then re-crisp in a 425°F oven for 8 to 12 minutes right before serving.
What should I serve with pork belly?
I like something acidic or crunchy to balance the richness. Think quick pickles, citrusy slaw, roasted vegetables, or a bright salad. If you want a simple, reliable veggie side, Garlic Roasted Vegetables are an easy win.