The Timeless Allure of Apple Pie The scent of apple pie wafting through the house wraps you in a cozy, nostalgic blanket. It's more than dessert; it's a…
Delishing
All-Butter Flaky Pie Crust

Maya Brooks
Maya Brooks is a dedicated home cook and the lead recipe developer at Delishing, where she shares practical, foolproof meals for everyday life. With over a decade of hands-on kitchen experience, she specializes in creating approachable dishes that fit a variety of dietary needs and modern cooking methods. Maya is passionate about helping busy people get delicious, stress-free food on the table without needing formal culinary training.
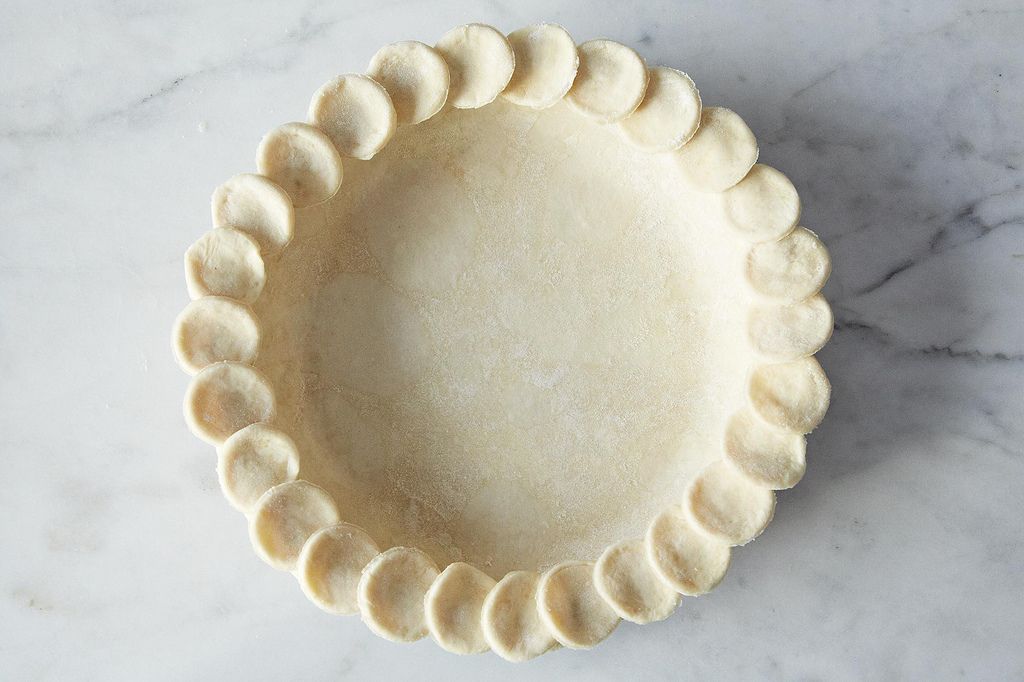
At 5:00 PM, I want recipes that behave. Pie dough can feel like it has moods, but it is really just temperature, hydration, and timing. Once you understand those three, an all-butter crust becomes the most reliable thing in your kitchen notebook. This is the dough I reach for when I want big flakes, clean butter flavor, and a crust that bakes up crisp, not tough.
This page is just the crust, on purpose. Master the dough once and you can pair it with anything from a classic fruit filling to a savory pot pie-style bake.
The ratio I remember
If you take nothing else from this page, take this. A great pie crust is a simple balance:
- Flour: structure
- Fat (cold): flake and tenderness
- Water (ice-cold): brings it together
- Salt: flavor
My go-to ratio by weight for an all-butter crust: about 4 parts flour : 3 parts butter, with about 1/3 to 1/2 part water (added gradually). For salt, I typically land around 1.5 to 2 percent of the flour weight, depending on how salty the butter is and what I am filling the pie with.
For most home kitchens, that translates neatly into the recipe below.
All-butter flaky pie dough (double crust)
Makes: enough for one 9-inch double-crust pie (top and bottom) or two single-crust pies
Key idea: keep the butter cold, and stop adding water the second the dough holds together.
Need a single crust? Make the full batch and freeze the second disk, or halve everything.
Ingredients
- 2 1/2 cups (300 g) all-purpose flour, plus more for rolling
- 1 teaspoon (6 g) fine sea salt
- 1 tablespoon (12 g) granulated sugar (optional, see sweet vs savory notes below)
- 1 cup (227 g) unsalted butter, very cold, cut into 1/2-inch cubes
- 6 to 10 tablespoons (90 to 150 g) ice water
- 1 teaspoon apple cider vinegar or lemon juice (optional, can help keep the dough tender)
Equipment
- Large bowl
- Pastry cutter or your fingertips
- Measuring cup for ice water
- Plastic wrap or reusable wrap
Method
- Mix dry ingredients. In a large bowl, whisk flour, salt, and sugar (if using) until evenly combined.
- Cut in the cold butter. Add butter cubes. Use a pastry cutter to cut butter into the flour until you have a mix of pea-size pieces and a few larger flat shards (think almond slices). Those larger bits are what become flaky layers.
- Add ice water gradually. Drizzle in 6 tablespoons ice water (and vinegar, if using). Toss with a fork. Keep adding water 1 tablespoon at a time until the dough looks shaggy and holds together when you squeeze a handful. It should not look wet. Most days I land around 8 tablespoons.
- Bring it together gently. Dump the shaggy dough onto the counter. Press it into a mound, then divide into 2 equal portions. Pat each into a 1-inch thick disk. You are aiming to press, not knead.
- Rest (do not skip). Wrap each disk tightly and refrigerate for at least 1 hour, ideally 2 hours. This chills the butter and relaxes any gluten so rolling is easier and the crust stays tender.
Make-ahead: Refrigerate up to 3 days. Freeze up to 3 months. Thaw overnight in the fridge before rolling.
About baking: This page covers the dough. For a filled pie, follow the baking temperature and timing from your filling recipe, since fruit pies, custards, and savory pies all bake differently.
Why cold butter matters
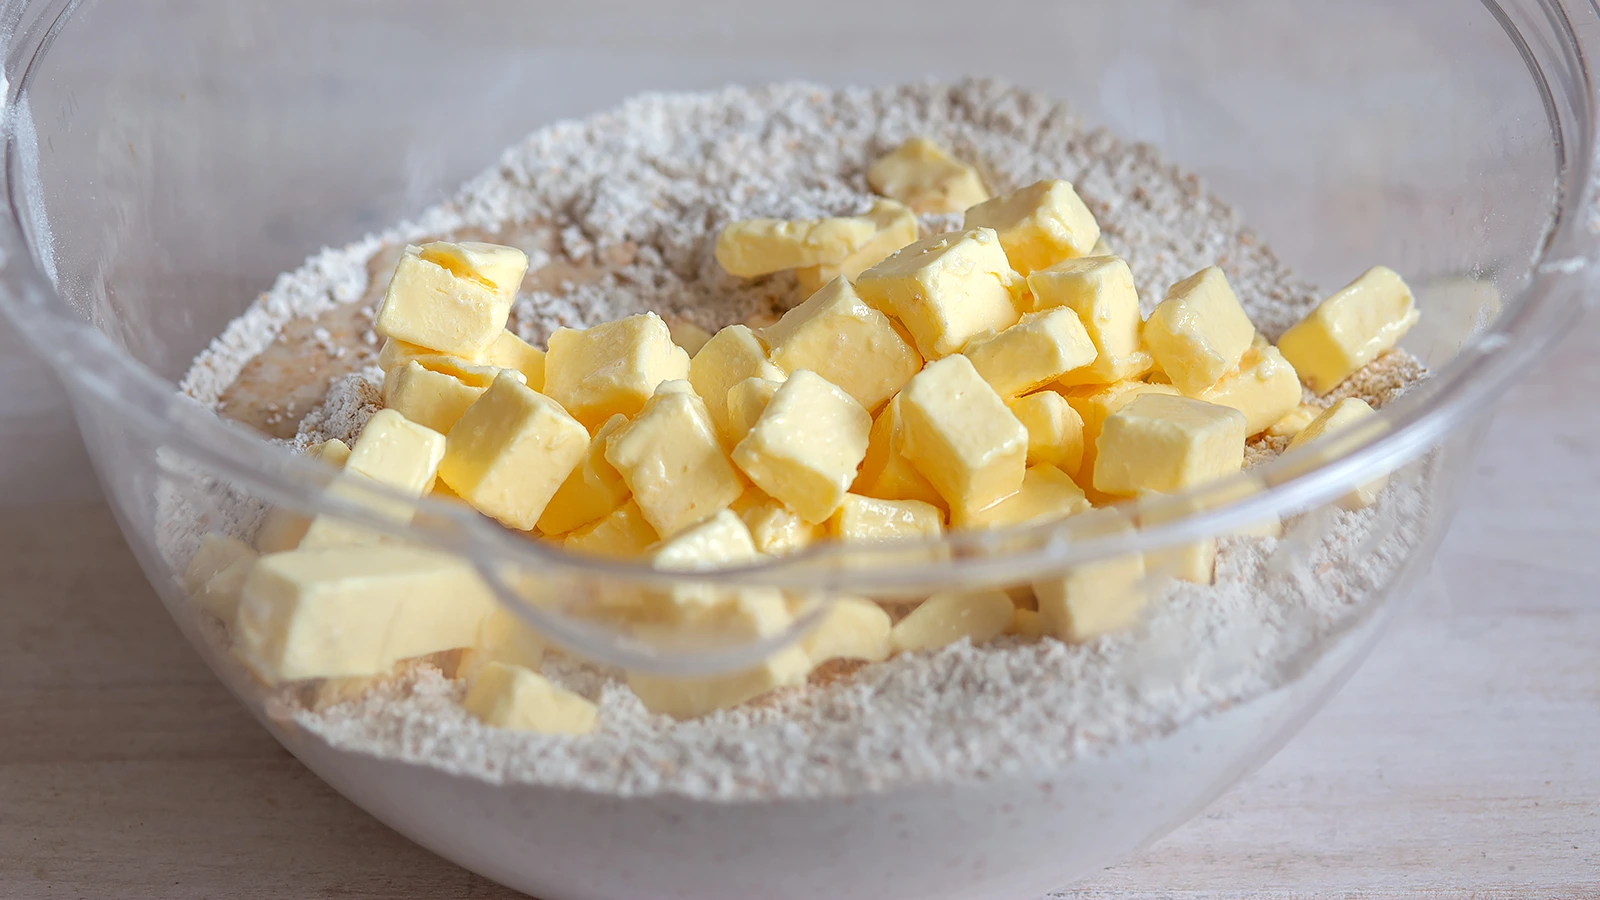
Butter melts fast. If it melts into the flour before baking, you lose distinct layers and end up with a more cookie-like crust. Cold butter stays in pieces. In the oven, those pieces melt and release steam, creating pockets and flakes.
- Too warm: greasy dough, shrinking crust, fewer flakes
- Just right: cool, firm dough with visible butter pieces
If your kitchen is warm, pop the bowl in the fridge for 10 minutes after cutting in the butter, then continue.
Hydration: how much water is enough
Pie dough fails in two common ways: it is either too dry to roll without cracking, or too wet and tough. The fix is learning what the dough should look like right after mixing.
Use this quick test
- Grab a handful of shaggy dough and squeeze.
- If it holds together and the edges do not crumble when you bend it, you are good.
- If it crumbles apart, add 1 tablespoon more ice water and toss again.
- If it feels sticky or smears on your fingers, stop adding water. Chill the bowl for 15 to 20 minutes, then continue. If it is still truly wet after chilling, sprinkle in a small spoonful of flour and toss gently (just enough to take the tacky edge off).
Humidity, flour brand, and how you measure all change hydration. That is why I give a range.
Resting matters
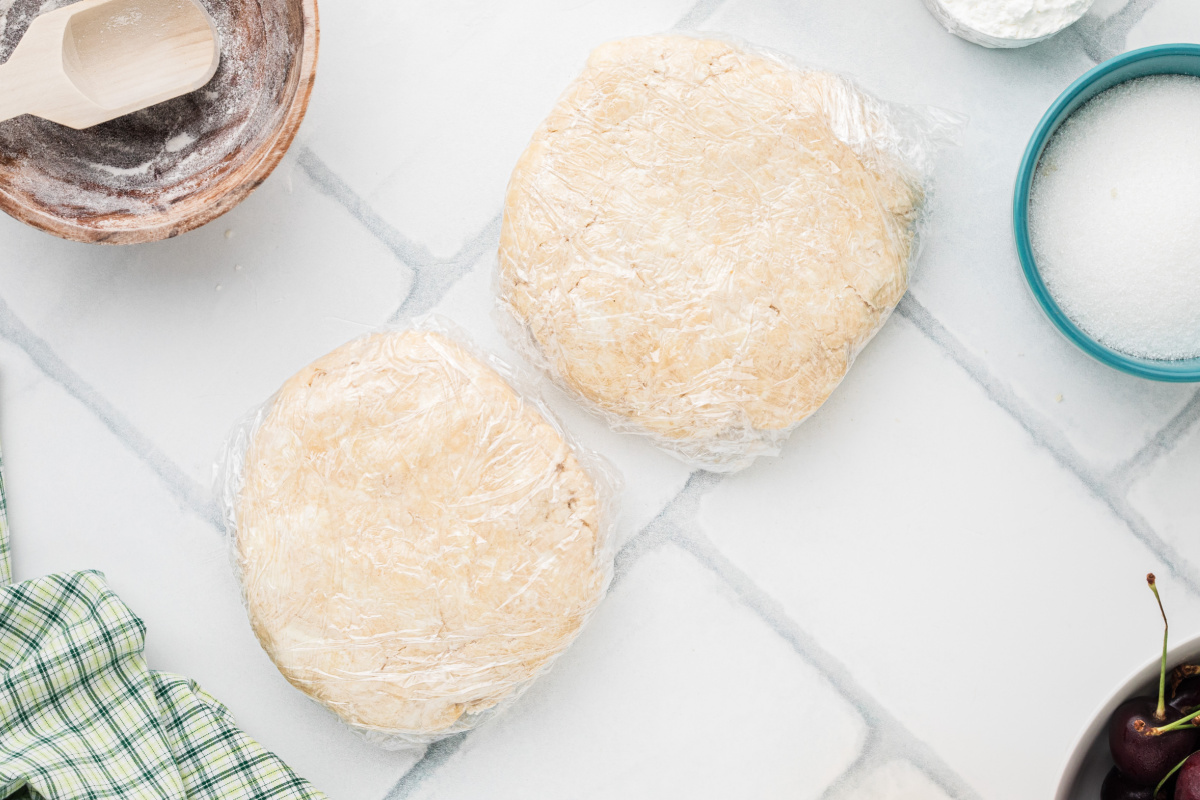
Resting does two things you want: it lets flour fully hydrate (less cracking), and it relaxes gluten (less shrinkage). If you try to roll immediately, you will notice the dough snapping back like a rubber band. That is your cue to chill it.
In my notebook, I literally wrote: “Dough that rests is dough that behaves.” It is still true.
Rolling made simple
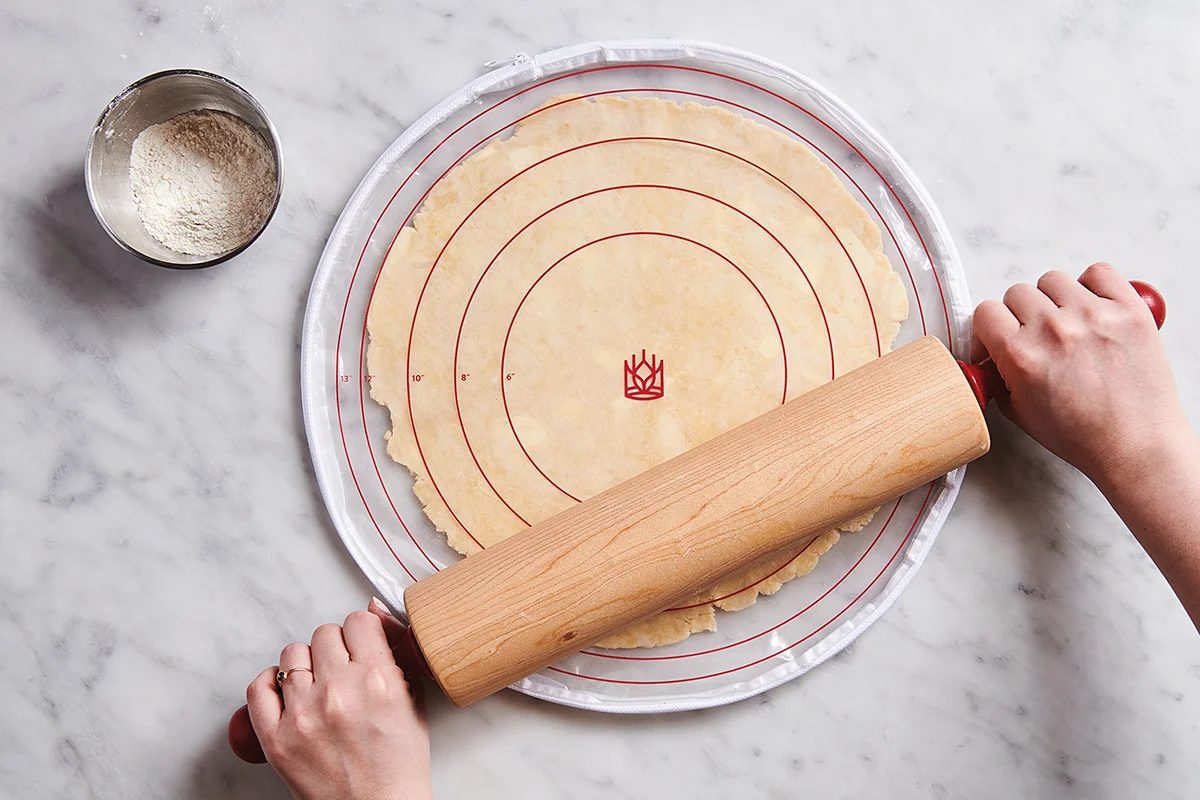
My low-drama rolling routine
- Let it soften slightly. Pull one disk from the fridge and let it sit 5 to 10 minutes. You want it cold but rollable.
- Flour lightly, then keep moving. Flour the counter and rolling pin. Roll from the center outward, turning the dough a quarter turn every few passes. Add tiny dustings of flour only as needed.
- Aim for thickness, not perfection. Roll to about 1/8-inch thick and roughly 12 inches across for a 9-inch pie plate.
- Transfer gently. Roll the dough around the pin and unroll into the pie plate. Lift edges, do not stretch. Stretching is the fastest way to get shrinkage later.
If it cracks: let it warm 1 minute, then patch by pressing the crack together with your fingertips. A little water on your finger helps “glue” it.
If it gets soft: slide it onto a sheet pan and chill 10 to 15 minutes before continuing.
Blind baking
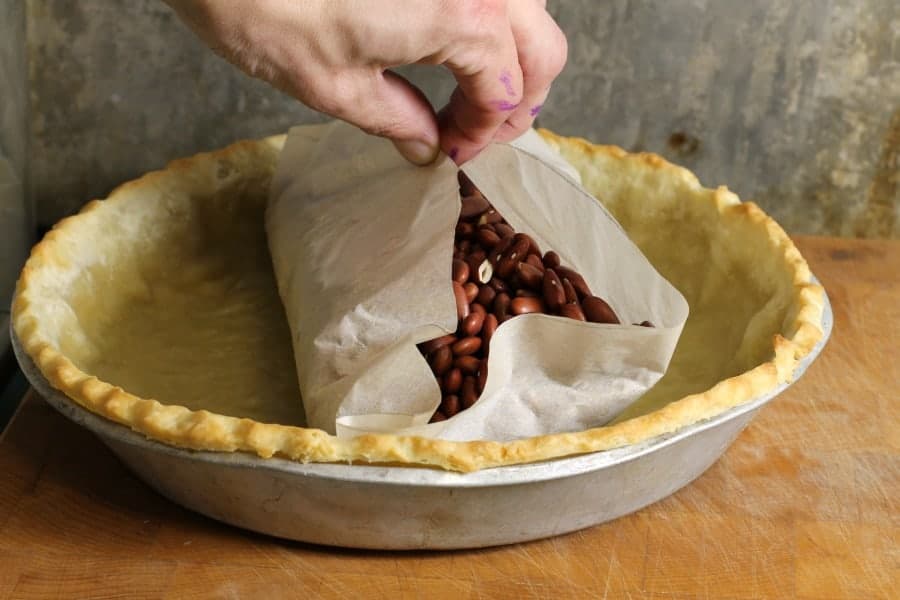
Blind baking is what you do when the filling is wet, quick-cooking, or no-bake. It keeps the crust from turning into a soggy layer.
When you should blind bake
- Custard pies and cream pies
- No-bake fillings
- Any time you want an extra-crisp bottom
How to blind bake
- Chill the shaped crust. Fit dough into your pie plate, crimp the edge, then freeze 20 to 30 minutes (or refrigerate 1 hour).
- Preheat the oven. 425°F.
- Dock, line, and weight. Prick the bottom lightly with a fork. Line with parchment paper, then fill with pie weights or dry beans all the way up to the sides.
- Bake with weights. Bake 15 to 18 minutes, until edges look set.
- Remove weights and finish. Carefully lift out parchment and weights. Return crust to the oven 8 to 12 minutes more for a partial bake (light golden) or 15 to 20 minutes for a full bake (deep golden and dry-looking).
Extra insurance against soggy bottoms: After removing the weights, brush the warm crust with a thin layer of beaten egg and bake 2 minutes. It creates a light barrier.
Shortening option
If you want a crust that is easier to roll and less likely to slump, a butter and shortening blend is a great option. Shortening melts at a higher temperature than butter, so it holds shape well. You will sacrifice a little butter flavor, but you gain workability.
Butter plus shortening swap
- Use 1/2 cup (113 g) unsalted butter plus 1/2 cup (96 g) vegetable shortening in place of the 1 cup butter.
- Keep everything else the same.
Tip: Chill the shortening too. It feels stable at room temp, but cold is still your friend for flakiness.
Sweet or savory
This dough works for both. The only tweak I make is sugar.
For sweet pies
- Add 1 tablespoon sugar for subtle sweetness and better browning.
- For a dessert crust that browns more deeply, you can go up to 2 tablespoons, but do not push much beyond that or it can burn at the edges.
For savory pies
- Skip the sugar.
- Optionally add 1/2 teaspoon black pepper or 1/2 teaspoon dried herbs (thyme is my favorite) to the flour.
If you are making a savory, cozy dinner situation, you might also like my puff pastry chicken pot pie for a faster weeknight approach. Different crust, same comfort-food payoff.
Troubleshooting
My dough is cracking when I roll it
- It is usually too dry or too cold.
- Let it sit 5 minutes, then try again.
- If it still cracks, mist your hands with a teaspoon of water and knead the disk just 2 or 3 times to distribute.
My crust shrank down the sides
- The dough was stretched when fitted into the pan, or it did not rest enough.
- Next time, lift and settle the dough into the corners instead of pulling it.
- Freeze the shaped crust before baking.
My crust is tough
- Too much water or too much mixing.
- Stop water additions earlier and press, do not knead.
Butter leaking onto the pan
- This usually means the dough warmed up, the butter started soft, or the crust did not get a good chill before baking.
- Chill longer, handle less, and make sure you still have visible butter pieces (pea-size with a few thin shards).
What to bake next
Once you have your dough ready, you can pair it with all kinds of fillings. If you want a classic dessert direction, start with my classic apple pie or go cozy with pumpkin pie with whipped cream. And if you are building your baking confidence, my beginner baking tips page is where I keep the little details that make everything smoother.