How to Make Classic Brown Sugar Ham Glaze on the Stove

The allure of a perfectly glazed ham lies in its harmonious blend of sweet and savory notes, creating a culinary centerpiece that's both comforting and impressive. A brown sugar glaze achieves this by caramelizing on the ham's surface, imparting a rich, deep sweetness while the Dijon mustard introduces a subtle tang that cuts through the richness of the meat. This combination results in a flavor profile that's irresistible.
This method is simple, quick, and provides maximum control over the glaze consistency and flavor. By making the glaze on the stove, you can easily adjust the sweetness and tanginess to your preference, ensuring a perfectly balanced glaze that complements the ham without overpowering it. The direct heat allows the sugar to dissolve evenly and the flavors to meld together seamlessly.
Understanding Brown Sugar
Brown sugar, the foundation of our glaze, comes in two main varieties: light and dark. Light brown sugar has a delicate molasses flavor, while dark brown sugar has a more robust, intense molasses taste. For this glaze, either will work, but dark brown sugar will impart a deeper, more complex flavor. Look for brown sugar that is soft and moist; if it's hard and dry, it can be revived by storing it in an airtight container with a slice of apple or a damp paper towel.
Why Cook Ham Glaze This Way?
- Versatility: This glaze works well with various types of ham, from bone-in to boneless, spiral-cut to whole.
- Flavor: The caramelized brown sugar creates a deep, rich sweetness balanced by the tangy Dijon mustard, resulting in a complex and satisfying flavor profile.
- Convenience: Making the glaze on the stove takes only minutes and requires minimal ingredients, making it a quick and easy way to elevate your ham.
Preparation (Mise en Place)
Before you begin, gather your ingredients and tools. This will streamline the cooking process and ensure that you have everything you need at your fingertips.
- Measure Ingredients: Accurately measure out your brown sugar, Dijon mustard, and apple cider vinegar. This ensures the correct balance of flavors.
- Choose Your Ham: Select a cooked ham that is ready to be glazed. A spiral-cut ham is ideal, as the glaze will penetrate into the slices more easily.
Essential Tools
- Small Saucepan: A small saucepan with a heavy bottom will ensure even heat distribution and prevent the glaze from scorching.
- Whisk: A whisk is essential for combining the ingredients and ensuring that the brown sugar dissolves completely.
- Basting Brush: A silicone basting brush is ideal for applying the glaze to the ham evenly.
- Measuring Cups and Spoons: Accurate measuring is crucial for a well-balanced glaze.
The Cooking Method
Method 1: Classic Brown Sugar Ham Glaze
This method focuses on creating a classic, well-balanced glaze with a rich, caramelized flavor.
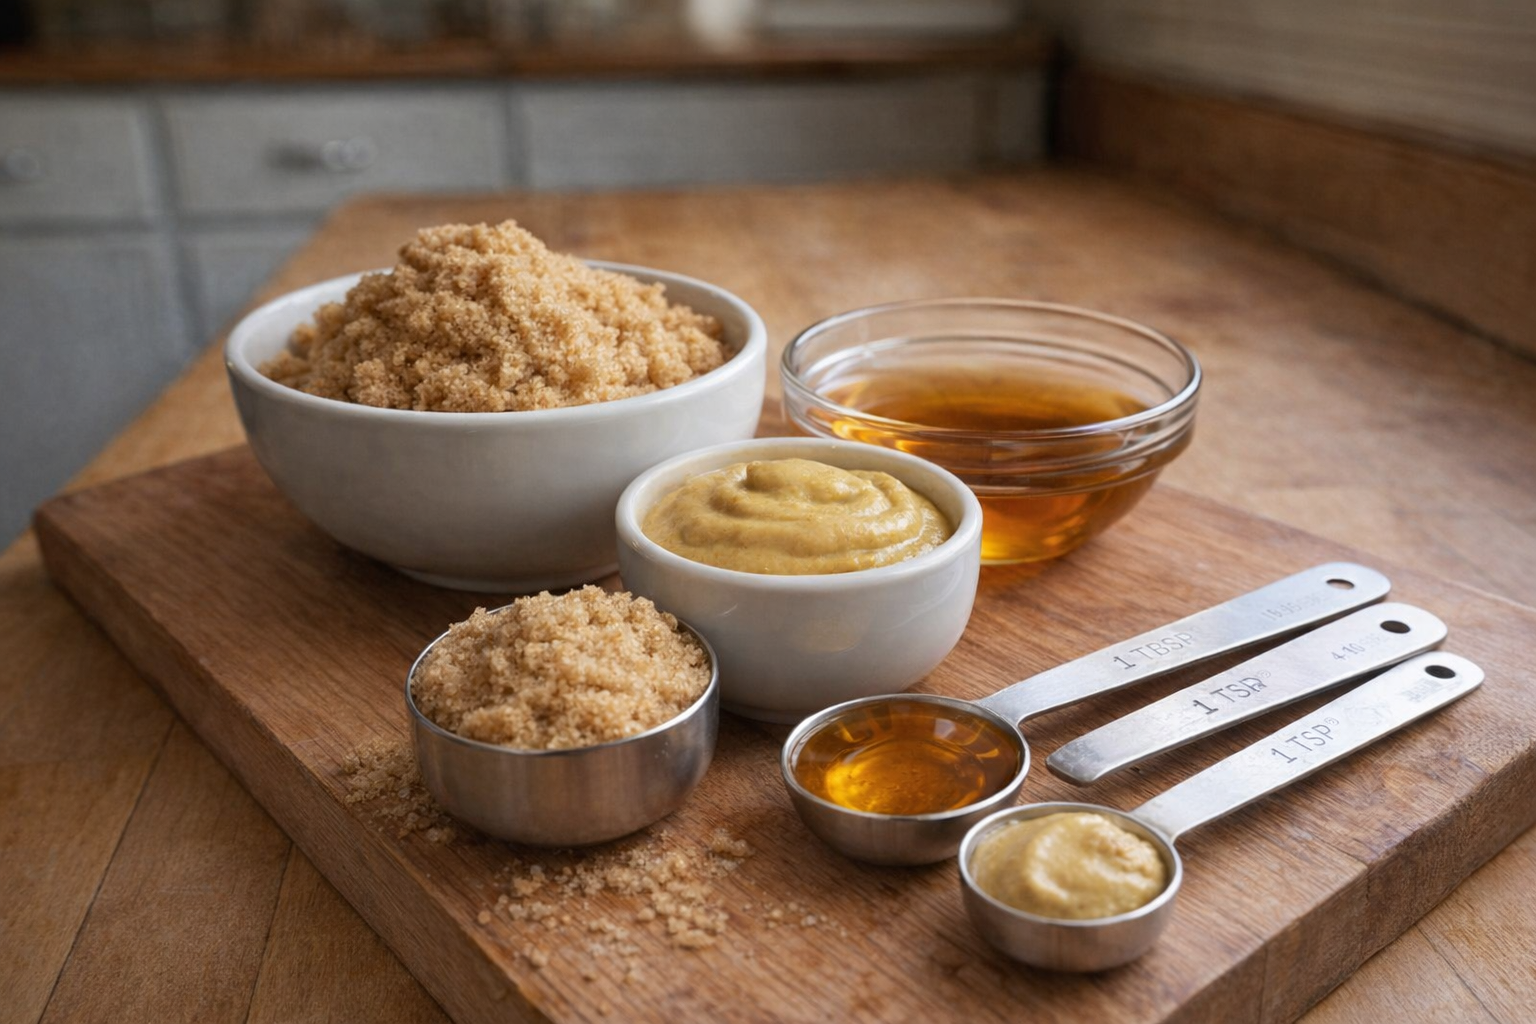
Ingredients:
- 1 cup (200g) packed brown sugar
- ¼ cup (60ml) Dijon mustard
- 2 tablespoons (30ml) apple cider vinegar
- Combine Ingredients: In the small saucepan, combine the brown sugar, Dijon mustard, and apple cider vinegar.
- Heat and Stir: Place the saucepan over medium heat. Whisk continuously until the brown sugar is completely dissolved and the mixture is smooth. As it heats, you'll hear a gentle sizzle and the aroma of sweet molasses will fill the air.
- Simmer: Bring the glaze to a gentle simmer, then reduce the heat to low. Continue to simmer for 5-7 minutes, stirring occasionally, until the glaze has thickened slightly and coats the back of a spoon. The glaze should now have a glossy appearance.
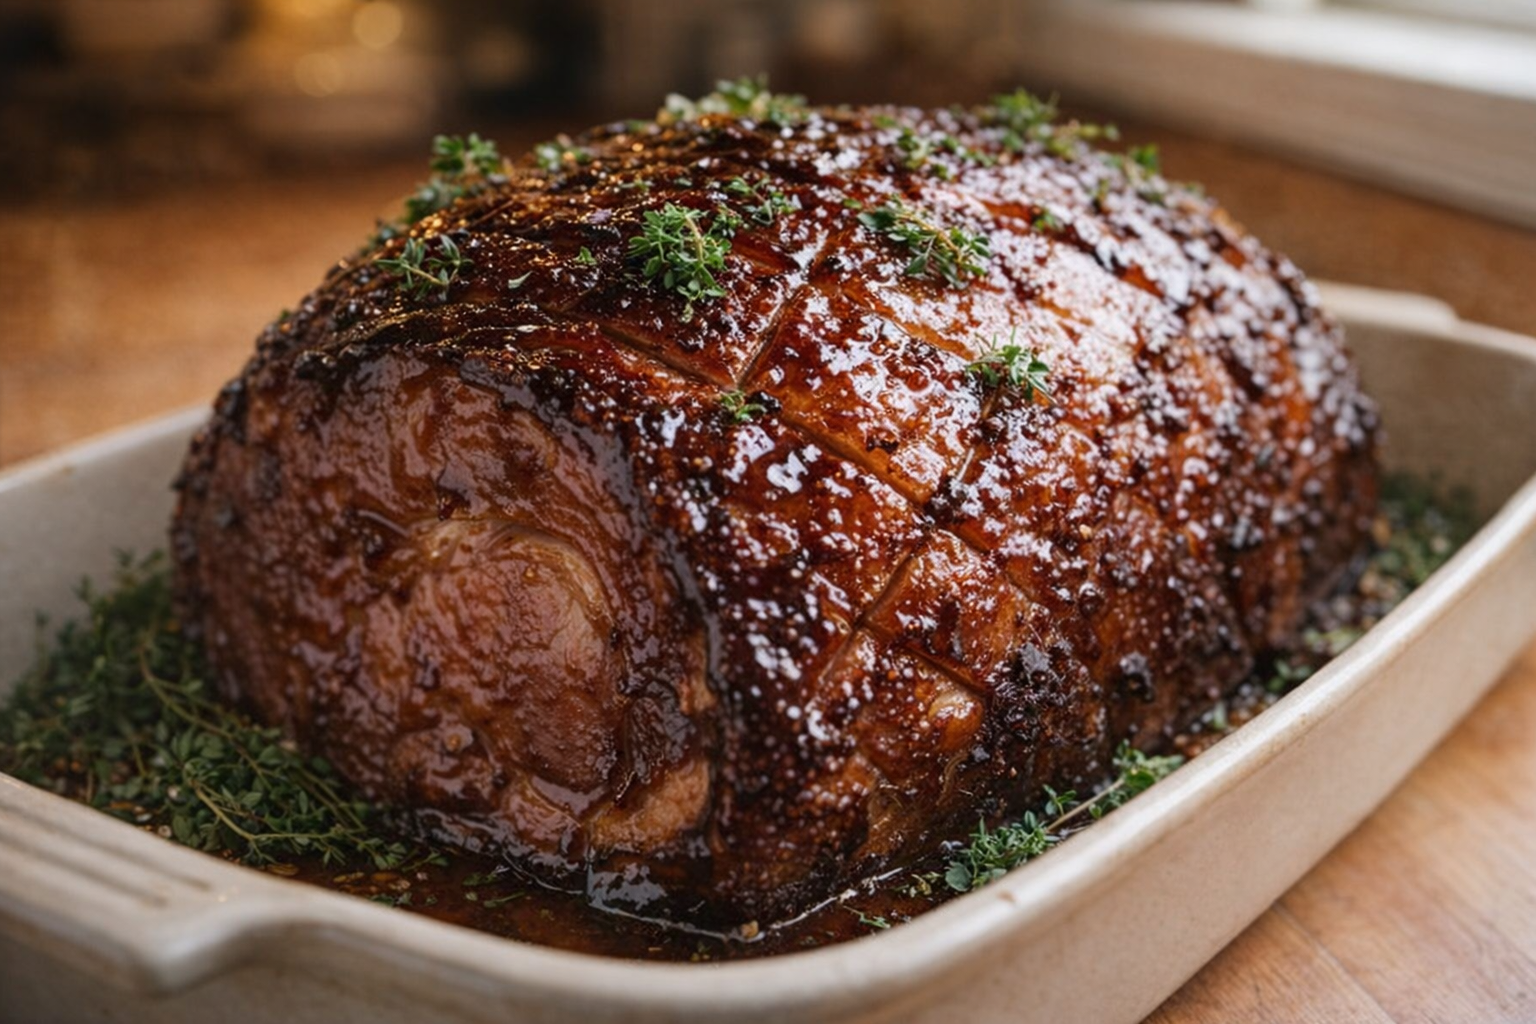
- Baste the Ham: During the last 30-45 minutes of the ham's baking time, remove the ham from the oven and brush generously with the glaze. Return the ham to the oven and continue baking, basting with the glaze every 10-15 minutes.
- Final Glaze: For the final basting, you can turn the oven up to broil for a minute or two. WATCH CAREFULLY to avoid burning the glaze.

Cooking Time & Doneness Guide
- Glaze Simmer Time: 5-7 minutes, or until thickened.
- Ham Baking Time: Follow the ham's packaging instructions for overall baking time. Glaze during the last 30-45 minutes.
- Internal Temperature: The ham should reach an internal temperature of 140°F (60°C) for optimal flavor and safety. Use a meat thermometer to check the temperature in the thickest part of the ham, avoiding the bone.
Visual Cues
- The glaze should be a rich, deep brown color.
- The surface of the ham should be glistening and slightly sticky.
- The glaze should have caramelized and slightly crisped around the edges of the ham.
Tips for Perfection
- Don't Overcook the Glaze: Overcooking the glaze can result in a hard, brittle coating that is difficult to slice. Simmer it gently until it thickens slightly, but avoid letting it boil rapidly.
- Baste Frequently: Basting the ham frequently with the glaze ensures that it is evenly coated and develops a rich, flavorful crust.
- Watch for Burning: Be careful not to burn the glaze, especially when broiling. Keep a close eye on the ham and remove it from the oven if the glaze starts to darken too quickly.
- Let the Ham Rest: After baking, let the ham rest for at least 10-15 minutes before slicing. This allows the juices to redistribute, resulting in a more tender and flavorful ham.
Storage & Reheating
- Storage: Store leftover glazed ham in an airtight container in the refrigerator for up to 3-4 days.
- Reheating: To reheat, wrap the ham in foil and bake in a preheated oven at 325°F (160°C) until heated through. You can also reheat individual slices in the microwave.
Serving Suggestions
- Holiday Dinner: Serve the glazed ham as the centerpiece of your holiday dinner, accompanied by classic sides like mashed potatoes, green bean casserole, and cranberry sauce.
- Sandwiches: Use leftover ham to make delicious sandwiches with your favorite toppings.
- Salads: Add diced ham to salads for a protein-packed and flavorful addition.
- Breakfast Hash: Dice the ham and add it to a breakfast hash with potatoes, onions, and peppers.

💡 Pro Tips
- Whisk the glaze constantly over medium-low heat to ensure the brown sugar dissolves completely without scorching at the bottom of the pan.
- Simmer the mixture until it is thick enough to coat the back of a metal spoon, which ensures it will cling to the ham rather than sliding off.
- Score the surface of the ham in a diamond pattern before applying the glaze to allow the flavors to penetrate the meat and create crispy, caramelized edges.
- Wait until the final 20 to 30 minutes of the ham's cooking time to apply the glaze to prevent the high sugar content from burning in the oven.
- If the glaze becomes too thick while cooling on the stove, whisk in a teaspoon of water or fruit juice at a time to reach your desired consistency.
Frequently Asked Questions
Yes, you can substitute Dijon mustard with yellow mustard or even a grainy mustard. Keep in mind that the flavor profile will change slightly, with yellow mustard offering a milder tang and grainy mustard adding texture.
To prevent burning, apply the glaze in thin, even layers during the last 30 minutes of cooking, basting frequently. Also, ensure your oven temperature isn't too high, and consider tenting the ham with foil if the glaze starts to darken too quickly.
Yes, you can prepare the glaze ahead of time and store it in an airtight container in the refrigerator for up to 3 days. When ready to use, gently reheat the glaze on the stovetop over low heat until it's smooth and easily brushable.
If your brown sugar is hardened, microwave it in a microwave-safe bowl with a damp paper towel on top for 15-30 seconds. Check it frequently to avoid melting the sugar, and break it up with a fork once softened.