How to Make Cream Cheese Pie Crust: A Baker's Guide

The cream cheese pie crust is a delightful twist on the classic, offering a subtle tang and richness that elevates both sweet and savory pies. The addition of cream cheese introduces a tenderness to the crust that's hard to achieve with traditional recipes, preventing the dryness that can sometimes plague homemade pie crusts. The slight acidity of the cream cheese also interacts with the gluten in the flour, further contributing to a flaky yet tender texture.
This guide will walk you through the process of making a cream cheese pie crust, highlighting the key steps and techniques that ensure a perfect result every time. We'll delve into the importance of using cold ingredients, the right mixing method, and the proper chilling time. Mastering this crust opens up a world of possibilities for your pie-making adventures.
Understanding Pie Crust Ingredients:
The quality of your pie crust depends on the ingredients you use. All-purpose flour provides the structure, while the fat (butter and cream cheese) creates the tenderness and flakiness. Salt enhances the flavors, and ice water binds the ingredients together. Choosing the right type of butter and cream cheese is crucial.
- Flour: All-purpose flour is the standard choice. Ensure it's fresh for the best results.
- Butter: Use unsalted butter, as the salt content in salted butter can vary, affecting the crust's overall flavor. Keep it chilled and cubed for easy incorporation.
- Cream Cheese: Full-fat cream cheese is recommended for its rich flavor and moisture content. Make sure it's cold.
- Water: Ice water is essential for keeping the butter and cream cheese cold, preventing the gluten from developing too much.
- Flavor: Adds a subtle tanginess and depth of flavor.
- Texture: Creates a tender, flaky crust that's less prone to dryness.
- Versatility: Works well with both sweet and savory fillings.
Preparation (Mise en Place)
The success of a cream cheese pie crust hinges on proper preparation. Cold ingredients are key to preventing the butter and cream cheese from melting prematurely, which would result in a tough crust.
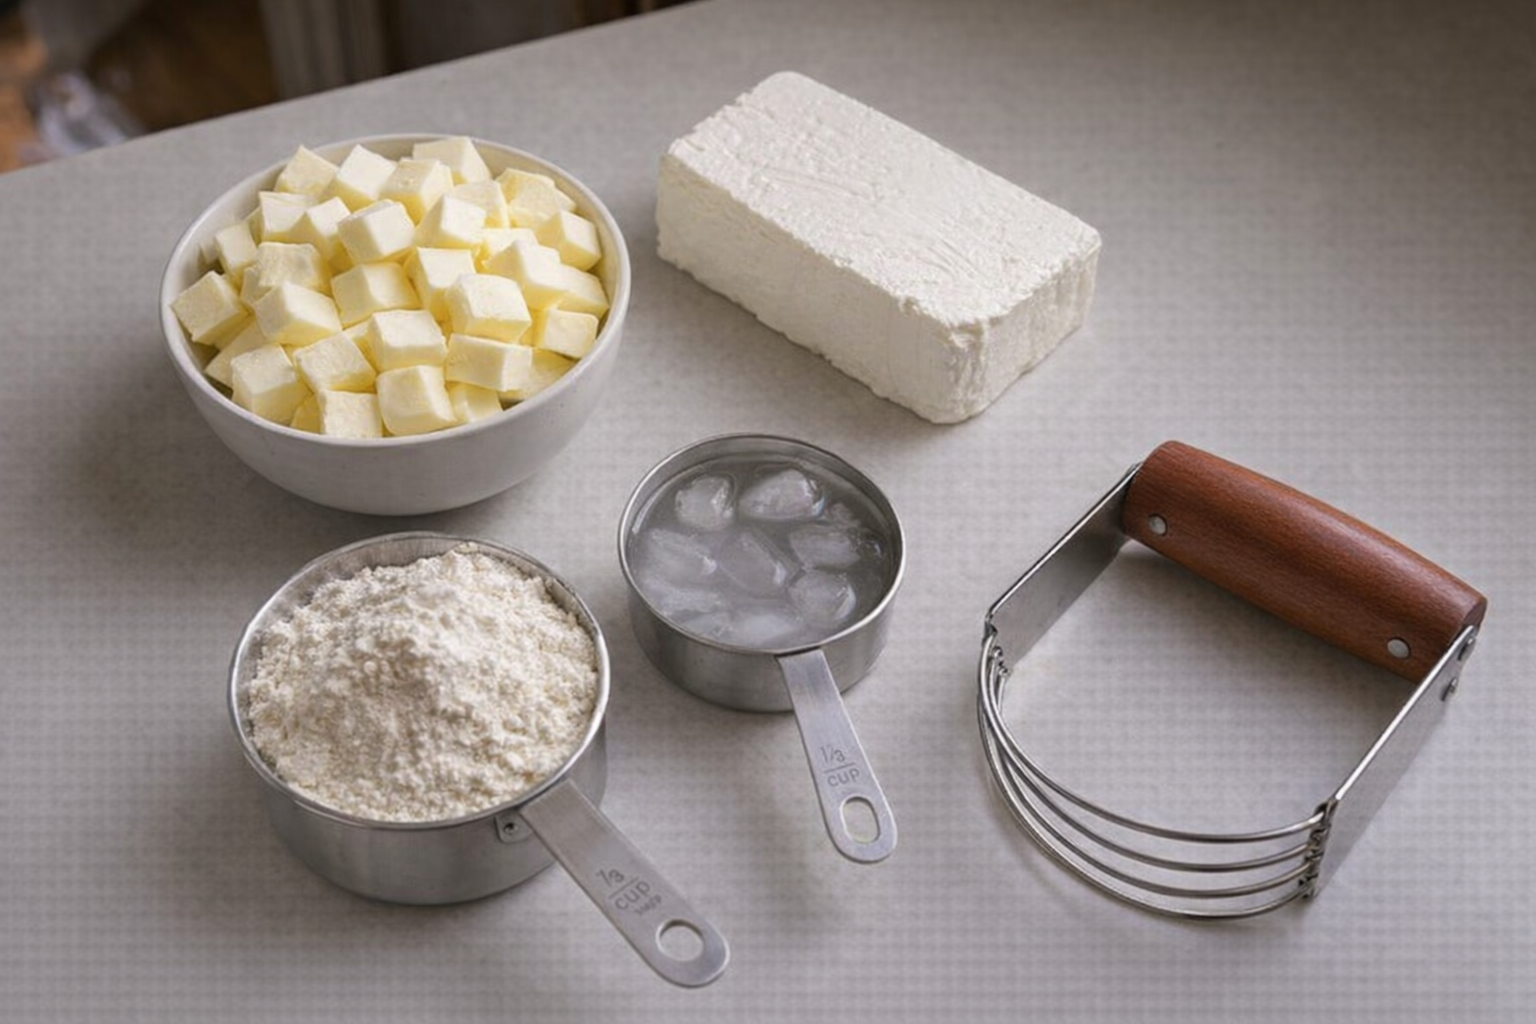
- Chill the Butter and Cream Cheese: Cut the unsalted butter into ½-inch cubes and refrigerate for at least 30 minutes. Ensure the cream cheese is also well-chilled.
- Measure Ingredients: Accurately measure out the flour, salt, and ice water.
- Prepare Ice Water: Fill a measuring cup with ice cubes and then add water to reach the desired amount. This ensures the water is as cold as possible.
Essential Tools
- Large Mixing Bowl: For combining the dry and wet ingredients. Stainless steel is ideal as it doesn't retain heat.
- Pastry Blender or Food Processor: To cut the butter and cream cheese into the flour. A pastry blender gives you more control, while a food processor is faster.
- Measuring Cups and Spoons: Accurate measurements are crucial for consistent results.
- Plastic Wrap: For wrapping and chilling the dough.
- Rolling Pin: For rolling out the dough to the desired thickness.
- 9-inch Pie Dish: The standard size for most pie recipes.
- Parchment Paper and Pie Weights (Optional): For blind baking the crust.
The Cooking Method
We will focus on the traditional method of making cream cheese pie crust, emphasizing the techniques that ensure a flaky and tender result.
Classic Cream Cheese Pie Crust
Ingredients:
- 1 1/2 cups (192g) all-purpose flour, plus more for dusting
- 1/2 teaspoon (3g) salt
- 1/2 cup (113g) cold unsalted butter, cut into 1/2-inch cubes
- 4 ounces (113g) cold cream cheese, cut into 1-inch cubes
- 2-4 tablespoons (30-60ml) ice water
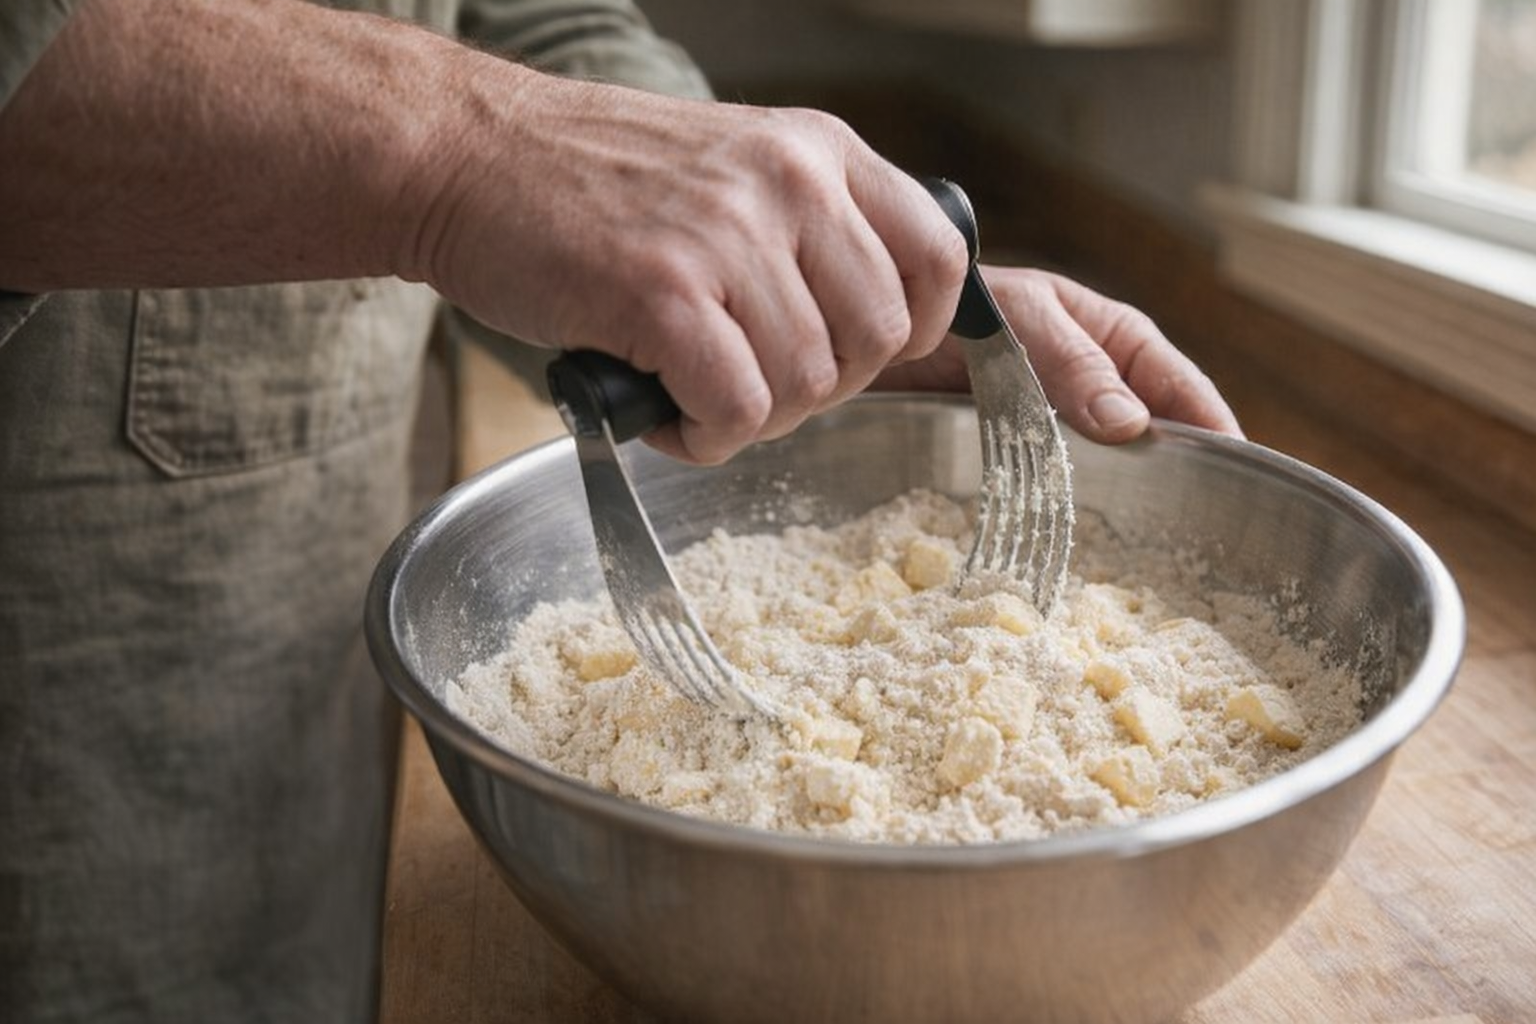
- Combine Dry Ingredients: In a large mixing bowl, whisk together the flour and salt. This ensures even distribution of the salt.
- Cut in the Butter and Cream Cheese: Add the chilled butter and cream cheese to the flour mixture. Using a pastry blender or your fingertips, cut the butter and cream cheese into the flour until the mixture resembles coarse crumbs. The largest pieces of butter should be no bigger than pea-sized.
- Add Ice Water: Sprinkle 2 tablespoons of ice water over the flour mixture. Gently mix with a fork until the dough begins to come together. Add more ice water, 1 tablespoon at a time, if needed, until the dough is just moist enough to form a ball. Be careful not to overmix. You want to see streaks of butter in the dough.
- Form and Chill the Dough: Gather the dough into a ball. Flatten it into a disk about 1-inch thick. Wrap the disk tightly in plastic wrap and refrigerate for at least 1 hour, or up to 2 days. This chilling period allows the gluten to relax, resulting in a more tender crust.
- Roll Out the Dough: On a lightly floured surface, roll out the dough to a 12-inch circle. Work quickly and gently to prevent the butter from melting. If the dough becomes too warm, return it to the refrigerator for a few minutes to chill.
- Transfer to Pie Dish: Carefully transfer the rolled-out dough to a 9-inch pie dish. Gently press the dough into the bottom and up the sides of the dish.
- Trim and Crimp Edges: Trim any excess dough from the edges of the pie dish. Crimp the edges using your fingers or a fork to create a decorative border.
- Blind Bake (Optional): If your recipe calls for a pre-baked crust, prick the bottom of the crust with a fork to prevent it from puffing up. Line the crust with parchment paper and fill it with pie weights or dried beans. Bake in a preheated oven at 375°F (190°C) for 15-20 minutes, or until the edges are lightly golden. Remove the parchment paper and pie weights and bake for another 5-10 minutes, or until the bottom of the crust is set.
- Fill and Bake: Fill the crust with your desired pie filling and bake according to your recipe's instructions.
Cooking Time & Doneness Guide
The cooking time for a cream cheese pie crust depends on whether you're blind baking it or baking it with a filling.
- Blind Baking: 15-20 minutes at 375°F (190°C) with pie weights, then another 5-10 minutes without.
- With Filling: Follow the baking instructions for your specific pie recipe.
Visual Cues
- Color: The crust should be golden brown and evenly baked.
- Texture: The edges should be firm and crisp.
Tips for Perfection
- Keep Ingredients Cold: This is the most crucial tip. Warm butter and cream cheese will result in a tough crust.
- Don't Overmix: Overmixing develops the gluten in the flour, leading to a tough crust. Mix only until the dough just comes together.
- Chill the Dough: Chilling the dough allows the gluten to relax and the butter to firm up, resulting in a flakier crust.
- Handle with Care: Be gentle when rolling out the dough to prevent it from tearing.
Storage & Reheating
- Storage: Store baked pie crusts at room temperature for up to 2 days or in the refrigerator for up to 5 days. Unbaked pie crust dough can be stored in the refrigerator for up to 2 days or in the freezer for up to 2 months.
- Reheating: Reheat baked pie crusts in a preheated oven at 350°F (175°C) for 5-10 minutes, or until warmed through.
Serving Suggestions
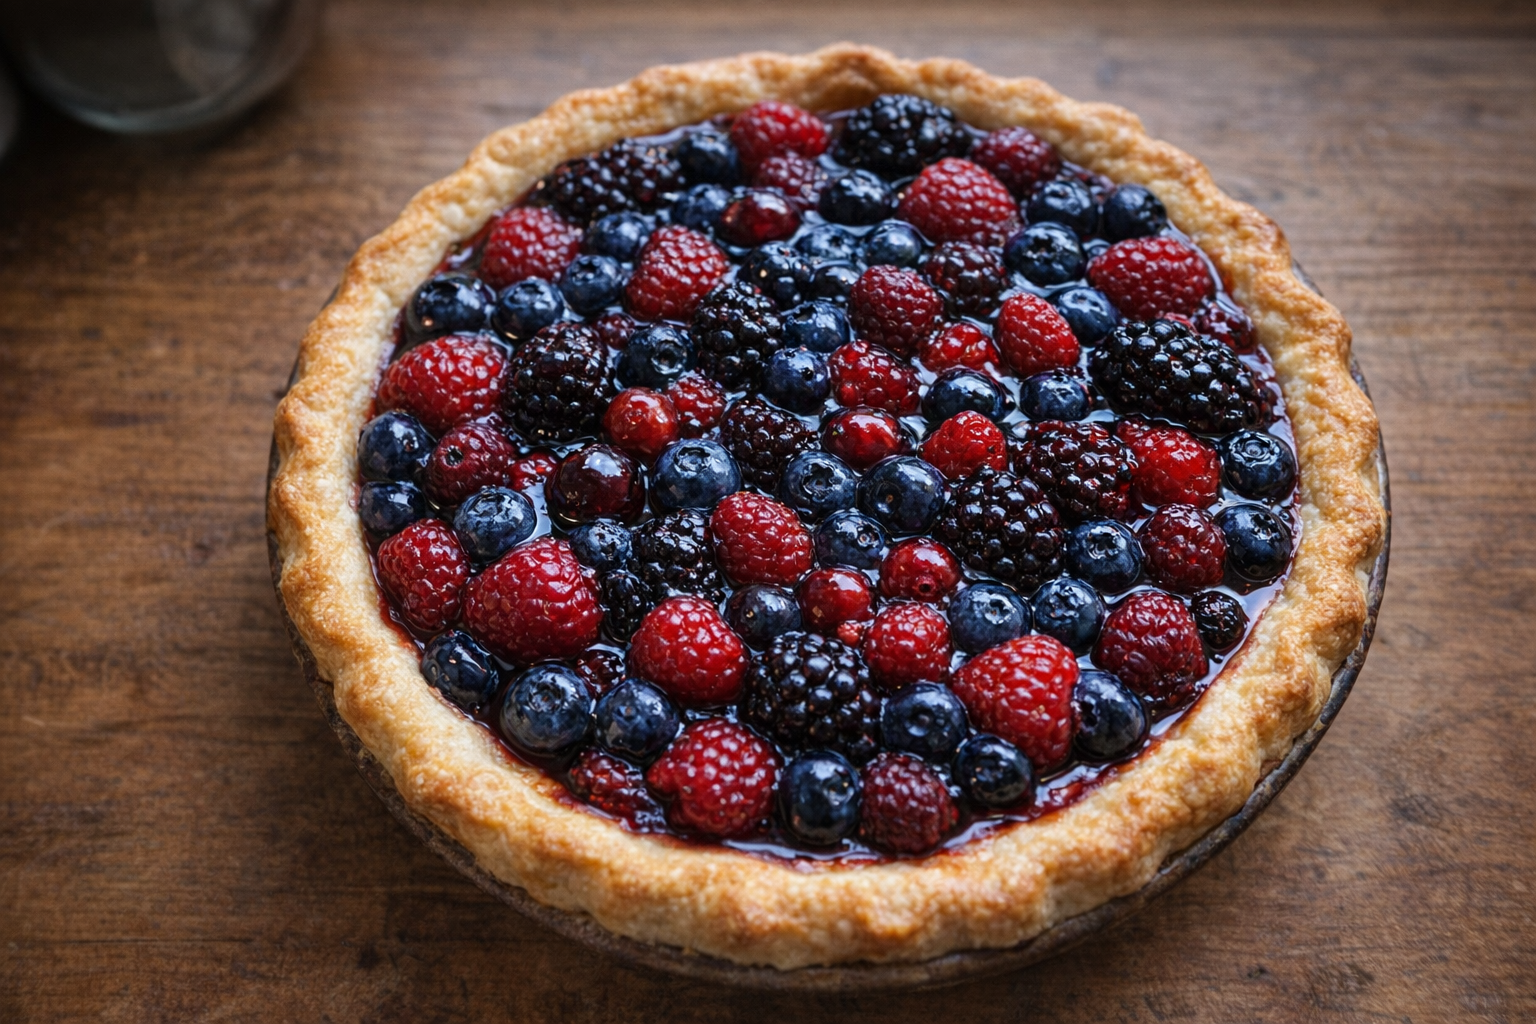
- Classic Fruit Pie: Fill with apples, berries, or peaches for a traditional dessert.
- Savory Quiche: Use the crust as a base for a savory quiche with cheese, vegetables, and eggs.
- Chocolate Cream Pie: A decadent combination of a creamy chocolate filling in a cream cheese crust.
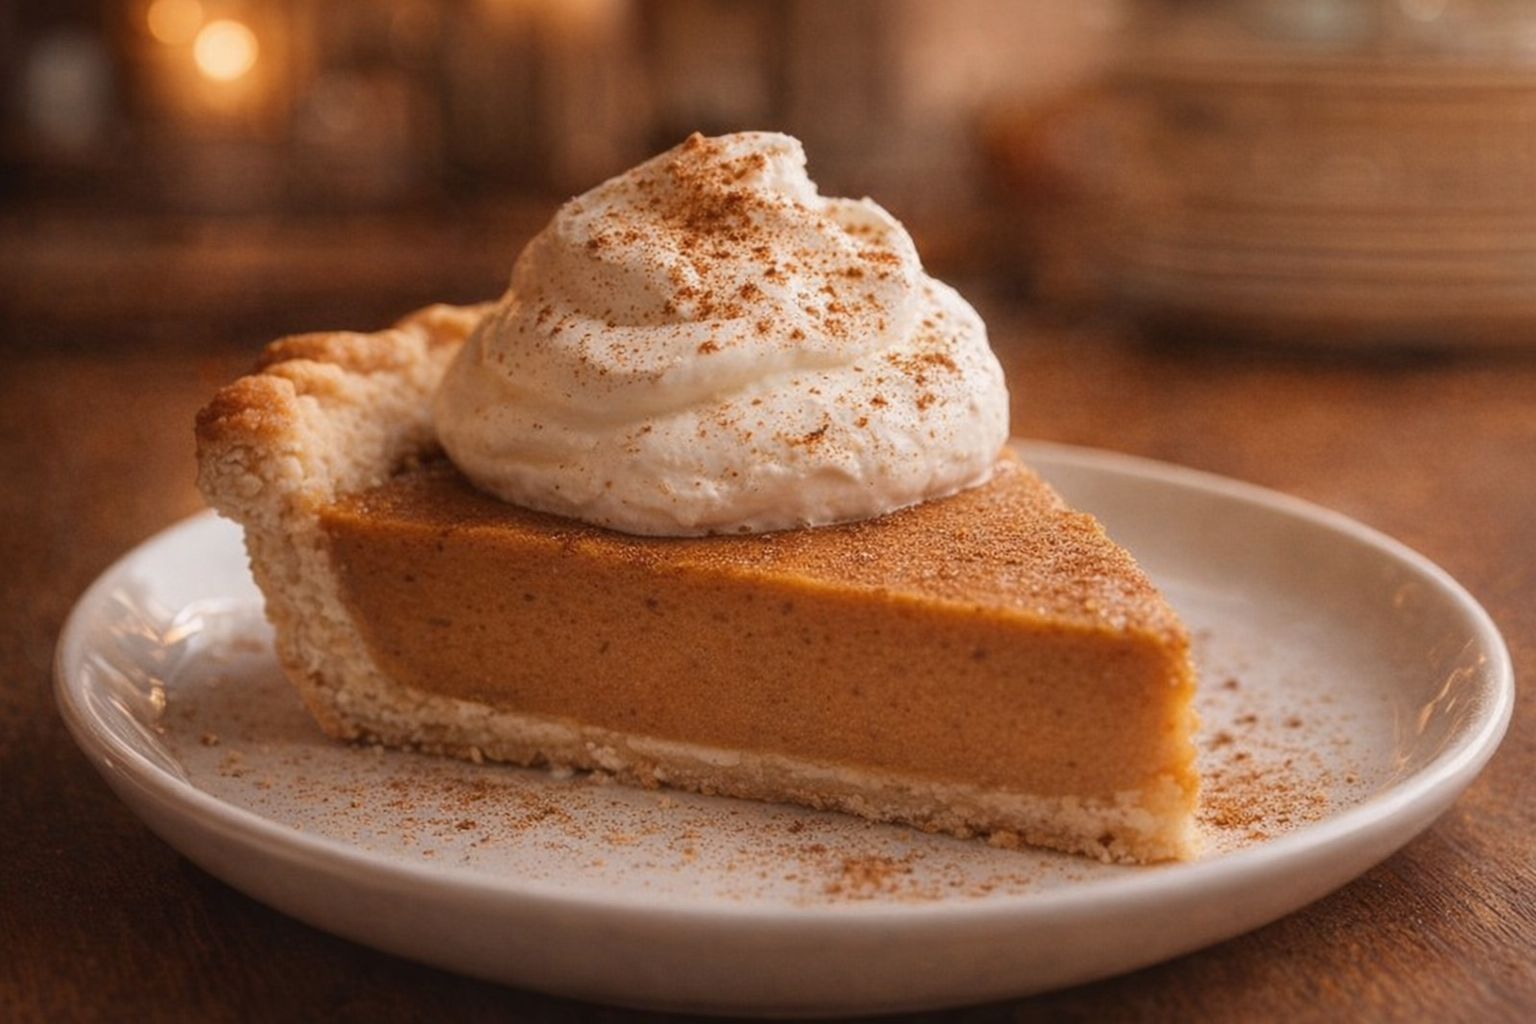
- Pumpkin Pie: The tangy cream cheese crust complements the richness of pumpkin pie filling.
💡 Pro Tips
- Use a pastry blender or your fingertips to cut in the butter and cream cheese; avoid overworking the dough.
- After forming the dough into a disk, consider wrapping it in plastic wrap and chilling it for at least 30 minutes before rolling it out. This will make the dough easier to handle.
- If the dough becomes too warm or sticky while rolling, place it back in the refrigerator for a few minutes to firm up.
- When transferring the rolled-out dough to the pie dish, gently fold it in half or quarters to avoid tearing. Unfold it carefully once it's in the dish.
- For a golden brown crust, consider brushing it with an egg wash (1 egg beaten with 1 tablespoon of water) before baking. This will also add a nice sheen.
Frequently Asked Questions
While you can use salted butter, it's best to use unsalted butter so you can control the amount of salt in the recipe. If using salted butter, reduce the amount of added salt by half (to 1/4 teaspoon) and taste the final product before serving to see if more salt is needed.
Shrinkage is often caused by gluten development. Make sure you don't overmix the dough. Also, chill the dough thoroughly before rolling it out, and after placing it in the pie dish, chill it again for at least 30 minutes before baking. Ensure the oven is preheated to the correct temperature.
Yes! This cream cheese pie crust dough can be made up to 2 days in advance. Wrap it tightly in plastic wrap and store it in the refrigerator. You can also freeze the dough for up to 3 months. Thaw it in the refrigerator overnight before rolling it out.
If your cream cheese isn't cold enough, place it in the freezer for about 10-15 minutes before starting the recipe. You want it firm but not frozen solid. You can also place the cubed butter in the freezer at the same time, even if it was already in the refrigerator. Working with very cold ingredients will ensure the best flaky texture.