How to Bake a Perfect Pie Crust

A perfectly baked pie crust is the foundation of countless delicious desserts and savory dishes. It's a blank canvas, ready to cradle sweet fruit fillings, creamy custards, or hearty quiches. Mastering the art of pie crust is about understanding the delicate balance between ingredients, temperature, and technique. The goal is a flaky, tender crust that complements the filling without overpowering it, adding textural contrast and a subtle buttery flavor.
This guide will walk you through every step, from selecting the right ingredients to troubleshooting common problems. We'll focus on techniques that professional bakers use to achieve consistent results. By understanding the science behind the bake, you'll be able to confidently create pie crusts that are not just good, but truly exceptional. We'll discuss different methods, ensuring your pie crust is never soggy, tough, or unevenly baked again.
Understanding Pie Crust Ingredients
Creating the perfect pie crust hinges on understanding how each ingredient contributes to the final product. The quality and type of your ingredients can significantly impact the crust's texture, flavor, and overall success.
- Flour: All-purpose flour is the standard choice, providing the necessary structure. Bread flour contains too much gluten, leading to a tough crust, while cake flour lacks the necessary strength. Ensure you measure accurately; spoon the flour into your measuring cup and level it off rather than scooping directly from the bag.
- Fat (Butter & Shortening): This is where the magic happens. Butter contributes a rich, delicious flavor, while shortening creates a more tender, flaky texture. Many bakers use a combination of both for the best of both worlds. The fat must be cold.
- Salt: Enhances the flavor and balances sweetness, even in savory pies.
- Sugar (Optional): A small amount of sugar adds a subtle sweetness and helps with browning. It's more commonly used in sweet pie crusts.
- Ice Water (or Vodka Mixture): Binds the ingredients together. The key is to use ice water to keep the fat cold. Some bakers use a mix of water and vodka, as the alcohol inhibits gluten development, promoting tenderness. Use sparingly, adding only enough to bring the dough together.
Why Bake Pie Crust This Way?
- Versatility: A well-made pie crust can be used for sweet and savory dishes.
- Flavor: Homemade pie crust delivers a depth of flavor that store-bought crusts can't match, especially when using quality butter.
- Convenience: Making your own dough means you control the ingredients, ensuring a healthier, tastier option.
Preparation (Mise en Place)
Proper preparation is crucial for a successful pie crust. This involves chilling ingredients and ensuring your tools are ready.
- Chill Ingredients: Place butter, shortening, and even your flour in the refrigerator for at least 30 minutes before starting.
- Measure Accurately: Have all your ingredients measured and ready to go. This minimizes the time the dough spends at room temperature.
- Prepare Ice Water: Fill a glass with water and add ice cubes. Measure out the required amount just before adding it to the dough.
Essential Tools
- Mixing Bowls (Large & Medium): Stainless steel bowls are ideal as they chill quickly and don't react with the ingredients.
- Pastry Cutter: This tool efficiently cuts the cold butter and shortening into the flour, creating the desired coarse crumb texture. If you don't have one, use your fingertips, working quickly to prevent the fat from melting.
- Rolling Pin: A smooth, heavy rolling pin is essential for rolling out the dough evenly. Marble rolling pins stay cool, which is beneficial.
- Pie Dish (9-inch): Glass pie dishes allow you to monitor the bottom crust's browning, while metal dishes conduct heat more efficiently, resulting in a crisper crust.
- Fork: For docking the dough.
- Parchment Paper & Pie Weights: Essential for blind baking.

The Cooking Method(s)
This section details the precise steps for making and baking your pie crust, incorporating techniques to ensure flakiness and even baking.
Making and Baking the Pie Crust
Ingredients:
- 1 1/4 cups (150g) all-purpose flour, plus extra for dusting
- 1/2 teaspoon (3g) salt
- 1 tablespoon (12g) sugar (optional)
- 1/4 cup (57g) unsalted butter, cold and cubed
- 1/4 cup (50g) vegetable shortening, cold and cubed
- 3-4 tablespoons (45-60ml) ice water
- Combine Dry Ingredients: In a large mixing bowl, whisk together the flour, salt, and sugar (if using). This ensures even distribution.
- Cut in the Fats: Add the cold, cubed butter and shortening to the flour mixture. Use a pastry cutter or your fingertips to cut the fats into the flour until the mixture resembles coarse crumbs with some pea-sized pieces remaining. This process creates small pockets of fat, which will create steam during baking and result in a flaky crust.
- Add Ice Water: Sprinkle 3 tablespoons of ice water over the flour mixture. Gently toss with a fork until the dough starts to come together. If needed, add more water, a tablespoon at a time, until the dough just holds together when pressed. The dough should be slightly crumbly but cohesive.
- Form the Dough Disk: Turn the dough out onto a lightly floured surface. Gather it into a ball, then flatten it into a disk about 1 inch thick. Wrap the dough disk tightly in plastic wrap and refrigerate for at least 30 minutes (or up to 2 days). This chilling process allows the gluten to relax, preventing a tough crust, and ensures the fats remain solid.
- Roll Out the Dough: Lightly flour your work surface and rolling pin. Place the chilled dough on the floured surface. Starting from the center, roll the dough outward, turning it a quarter turn every few rolls to maintain an even thickness. Roll the dough into a circle about 12 inches in diameter and about 1/8 inch thick.
- Transfer to Pie Dish: Gently fold the dough in half or drape it over your rolling pin to transfer it to the pie dish. Unfold or unroll the dough into the dish, pressing it gently into the corners and up the sides.
- Trim and Crimp the Edges: Trim the excess dough, leaving about a 1-inch overhang. Tuck the overhang under itself to form a thick edge, then crimp or flute the edges as desired.
- Add Filling: Add your chosen filling.
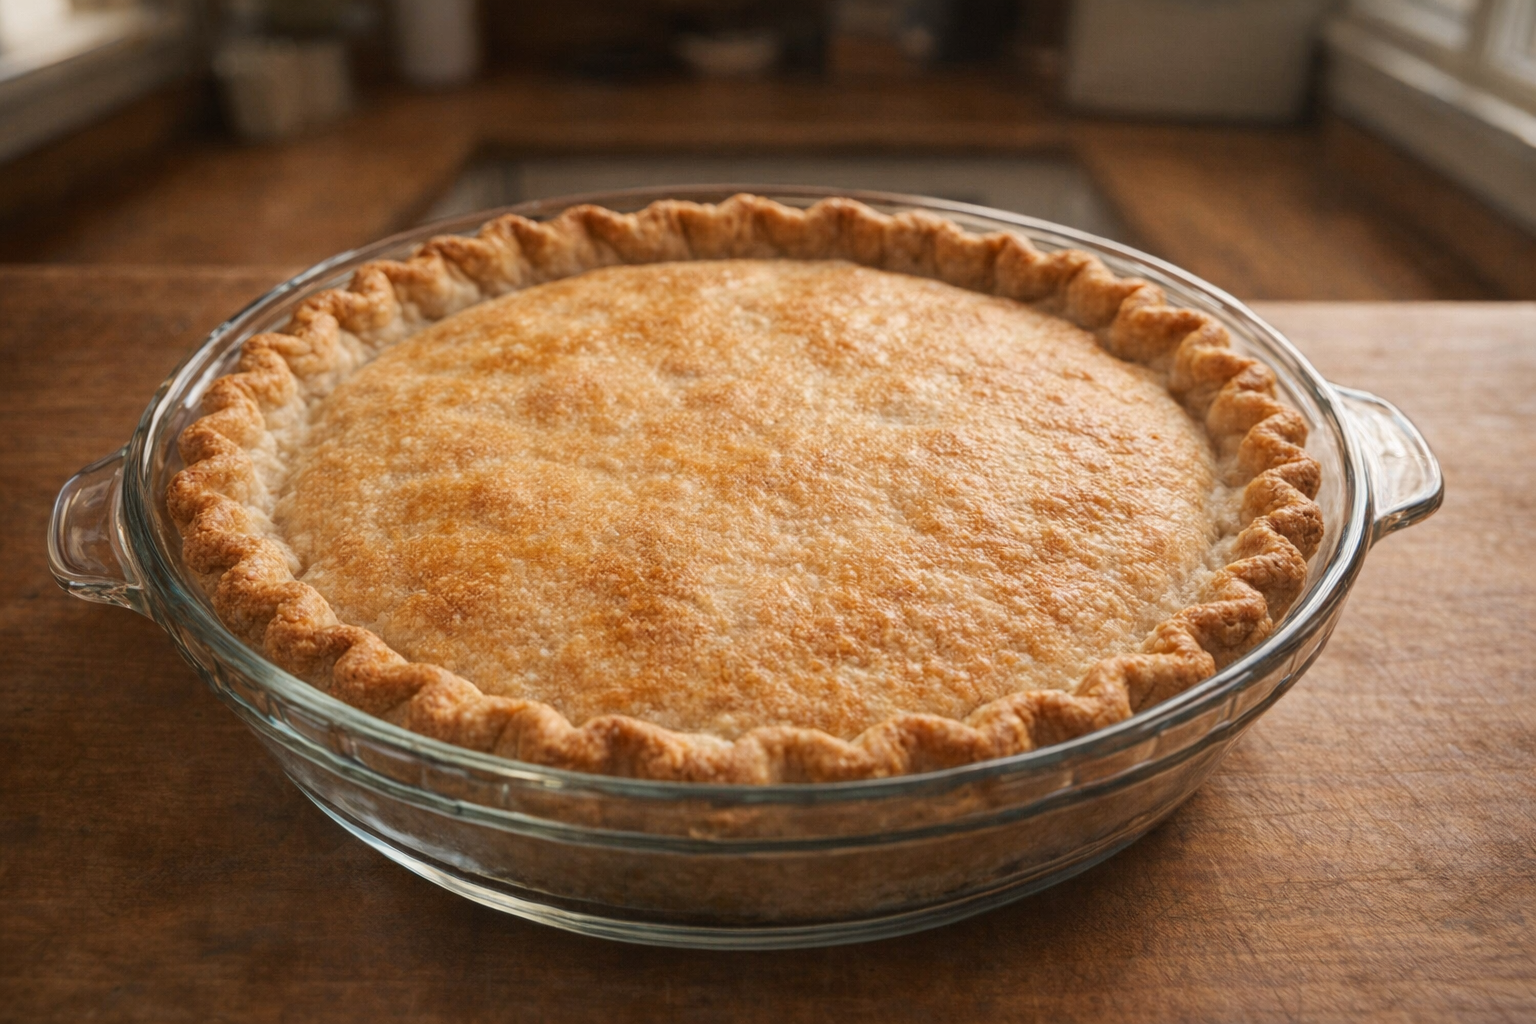
- Bake: Place the pie in a preheated oven at 375°F (190°C). Bake according to the filling's instructions, usually between 45 minutes to 1 hour. If the edges start to brown too quickly, cover them with aluminum foil or a pie shield. The crust should be golden brown and crisp.
- Cool and Serve: Remove the pie from the oven and let it cool on a wire rack completely before slicing and serving.

Cooking Time & Doneness Guide
- Baking Time: Typically 45 minutes to 1 hour at 375°F (190°C), depending on the pie filling and desired level of browning.
- Internal Temperature: Not applicable for pie crust alone.
Visual Cues
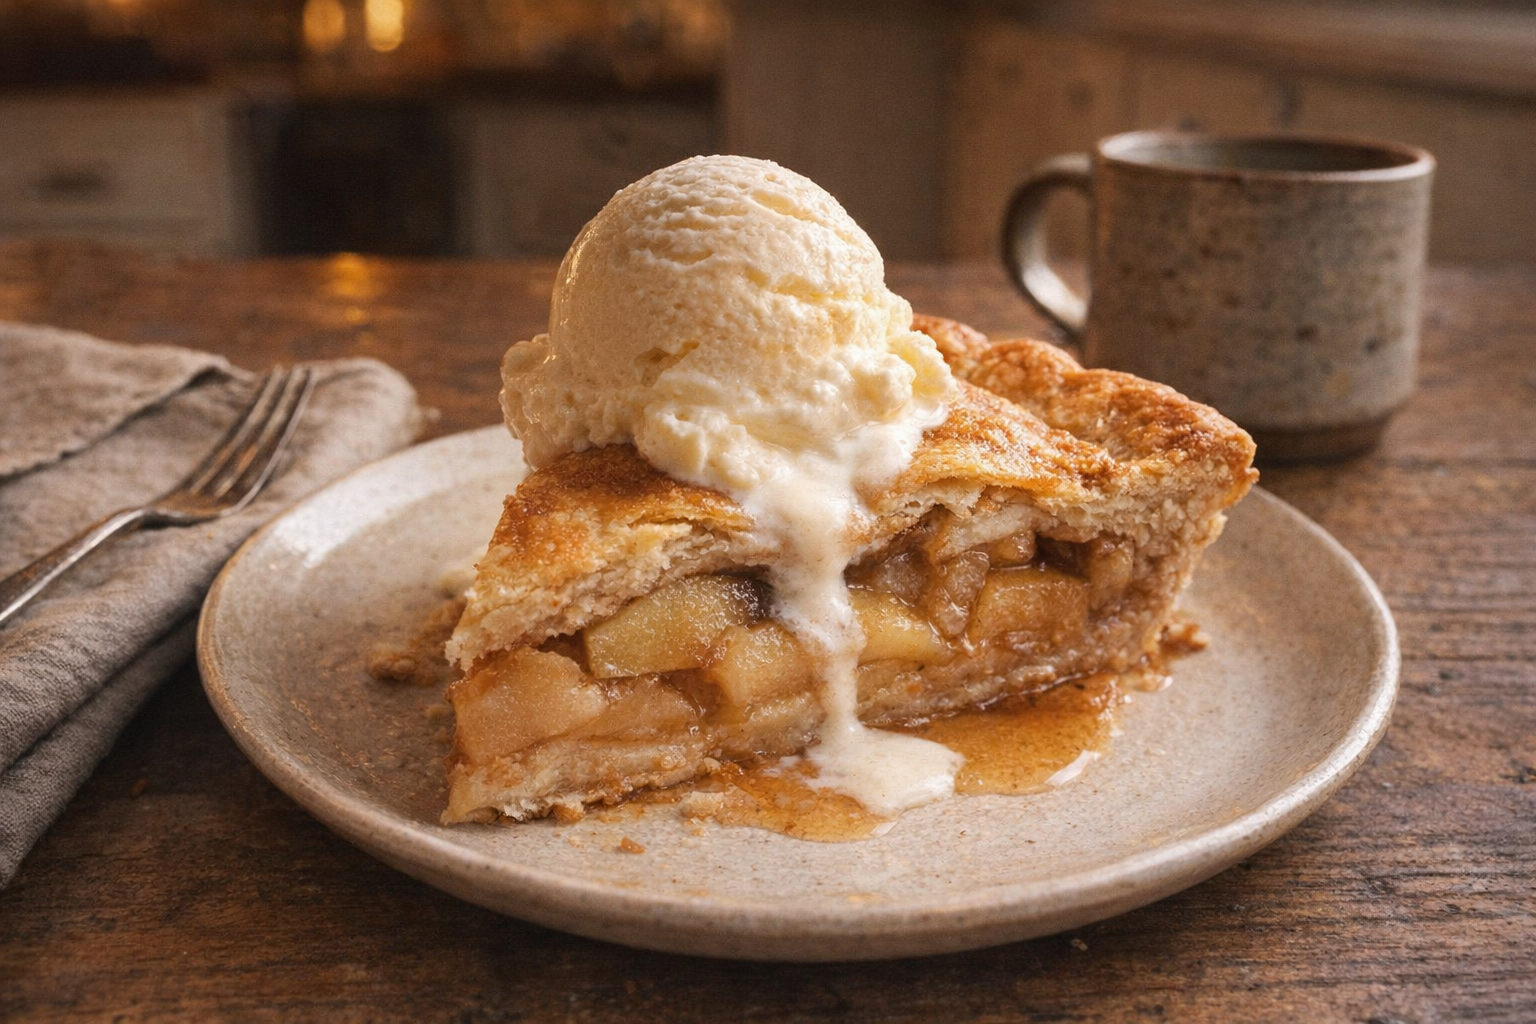
The crust should be golden brown and firm to the touch. The edges should be evenly browned, and the bottom crust should be crisp, not soggy. If blind baking, the crust should be set and lightly golden before removing the weights.
Tips for Perfection
- Avoid Overworking: Overmixing develops gluten, resulting in a tough crust.
- Keep Ingredients Cold: Cold ingredients are crucial for flakiness.
- Dock the Dough: Prick the bottom of the crust with a fork before baking to prevent bubbling.
- Use Pie Weights: When blind baking, use pie weights or dried beans to prevent the crust from puffing up.
Storage & Reheating
- Storage: Store leftover baked pie in the refrigerator, covered, for up to 3 days. Unbaked pie crust can be stored in the refrigerator for up to 2 days or frozen for up to 3 months.
- Reheating: To reheat baked pie, warm it in a preheated oven at 350°F (175°C) for 10-15 minutes until heated through. For best results, cover the edges with foil to prevent further browning.
Serving Suggestions
- Classic Fruit Pie: Apple, cherry, or blueberry pie served with a scoop of vanilla ice cream.
- Savory Quiche: Filled with cheese, vegetables, and eggs for a hearty brunch or lunch.
- Cream Pie: Chocolate, coconut, or banana cream pie topped with whipped cream.
- Hand Pies: Individual pie crusts filled with sweet or savory fillings for a portable treat.
💡 Pro Tips
- Keep all ingredients, especially the butter and water, ice-cold to ensure the fat doesn't melt before the crust hits the oven.
- Incorporate the fat until it resembles pea-sized crumbles to create the steam pockets necessary for a flaky texture.
- Chill the dough for at least thirty minutes after mixing to allow the gluten to relax and prevent the crust from shrinking.
- Roll the dough from the center outward while rotating it frequently to maintain an even thickness and prevent sticking.
- Blind bake the crust with weights if using a liquid filling to ensure the bottom stays crisp and fully cooked.
Frequently Asked Questions
Shrinkage is often caused by gluten development and fat melting too quickly. Make sure your ingredients are cold, avoid overworking the dough, and let the shaped crust rest in the refrigerator or freezer before baking to relax the gluten and solidify the fat.
Yes, you can use all butter. The crust will have a richer flavor, but it might be slightly less flaky than a crust made with a combination of butter and shortening. Be sure to keep the butter very cold and work quickly to prevent it from melting.
Pie crust dough can be stored in the refrigerator for up to 2 days, wrapped tightly in plastic wrap. For longer storage, freeze the dough for up to 3 months. Thaw it in the refrigerator overnight before using.
If you don't have vodka, simply use ice water. The vodka helps inhibit gluten development, but using ice water and avoiding overmixing the dough will also help to achieve a tender crust.