How to Cook a Juicy Pork Roast in the Oven

Pork roast, when cooked correctly, delivers a satisfying combination of textures and flavors. The exterior boasts a savory, seasoned crust, giving way to a tender, moist interior. The key to this lies in understanding the cut of meat and employing the right cooking method to achieve optimal results. Slow roasting allows the connective tissues to break down, resulting in a melt-in-your-mouth experience.
This method ensures the pork is cooked evenly, retaining its natural juices. The high initial heat sears the outside, locking in flavor, while the lower temperature gently cooks the interior to the perfect doneness. Mastering this technique means a flavorful and impressive centerpiece for any meal.
Understanding Pork Loin Roast
Pork loin roast often gets confused with pork tenderloin, but they are distinct cuts. The loin roast is wider and flatter than the tenderloin, providing a larger surface area for browning. This cut comes from the area between the shoulder and the beginning of the leg. Look for roasts that are pinkish-red in color with some marbling of fat. The fat will render during cooking, adding flavor and moisture to the meat. Avoid roasts that appear pale or have excessive amounts of external fat, as this can indicate lower quality. A good quality pork loin roast should be firm to the touch.
Why Cook Pork This Way?
- Versatility: Pork roast pairs well with a variety of sides, from roasted vegetables to creamy mashed potatoes, making it suitable for both casual and formal meals.
- Flavor: The oven roasting method allows the seasonings to penetrate the meat, creating a deep, savory flavor that's hard to resist.
- Convenience: With a few simple steps, the oven does most of the work. Simply season, set, and let the oven work its magic, freeing you to focus on other aspects of the meal.
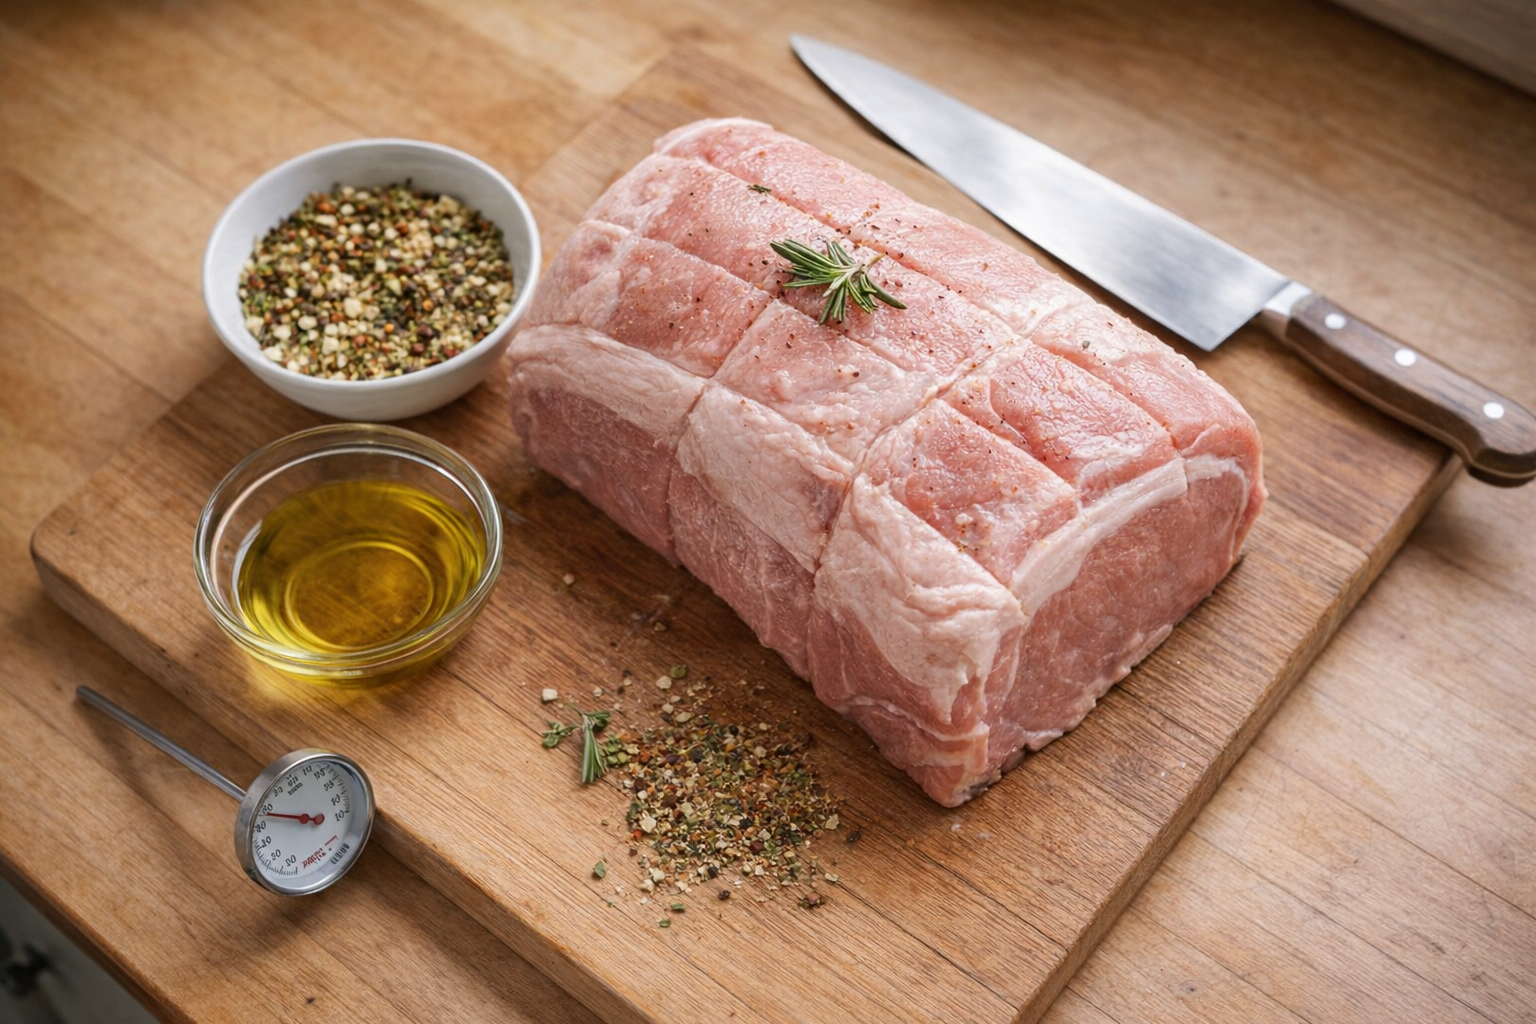
Preparation (Mise en Place)
- Thawing: If frozen, thaw the pork roast in the refrigerator for 24-48 hours, depending on its size. Never thaw meat at room temperature due to the risk of bacterial growth.
- Patting Dry: Use paper towels to thoroughly pat the pork roast dry. This step is crucial for achieving a beautiful, browned crust.
- Trimming (Optional): If there is an excessive layer of fat on the roast (more than 1/4 inch), you can trim some off, but leaving a thin layer is recommended for flavor and moisture.
Essential Tools
- Roasting Pan with Rack: The rack elevates the roast, allowing hot air to circulate evenly around the meat for consistent cooking and preventing the bottom from becoming soggy.
- Meat Thermometer: A reliable instant-read meat thermometer is essential for accurately monitoring the internal temperature and ensuring the pork is cooked to a safe and juicy doneness (145°F).
- Sharp Knife: A sharp knife is needed for trimming (if necessary) and for carving the roast after it has rested. A dull knife will tear the meat, resulting in uneven slices and loss of juices.
The Cooking Method(s)
Method 1: Classic Oven Roast
Ingredients:
- 1 (3-4 pound) boneless pork loin roast
- 2 tablespoons olive oil
- 1 teaspoon garlic powder
- 1 tablespoon paprika (sweet or smoked)
- 1 teaspoon dried sage
- 1 teaspoon dried thyme
- Salt and freshly ground black pepper to taste
- Preheat Oven: Preheat your oven to 450°F (232°C). Ensure the oven rack is positioned in the center.
- Prepare the Seasoning: In a small bowl, combine the garlic powder, paprika, dried sage, dried thyme, salt, and pepper. Mix well to ensure even distribution of spices.
- Season the Pork: Generously rub the pork roast all over with the olive oil. Then, sprinkle the seasoning mixture evenly over the entire surface of the roast, pressing gently to adhere.
- Sear the Roast: Place the seasoned pork roast on the rack in the roasting pan. Place the pan in the preheated oven and roast for 30 minutes. The high heat will help develop a flavorful crust. The aroma of roasting pork and herbs will begin to fill the kitchen.
- Reduce Temperature: After 30 minutes, reduce the oven temperature to 325°F (163°C). Continue roasting until the internal temperature reaches 145°F (63°C), using a meat thermometer inserted into the thickest part of the roast.
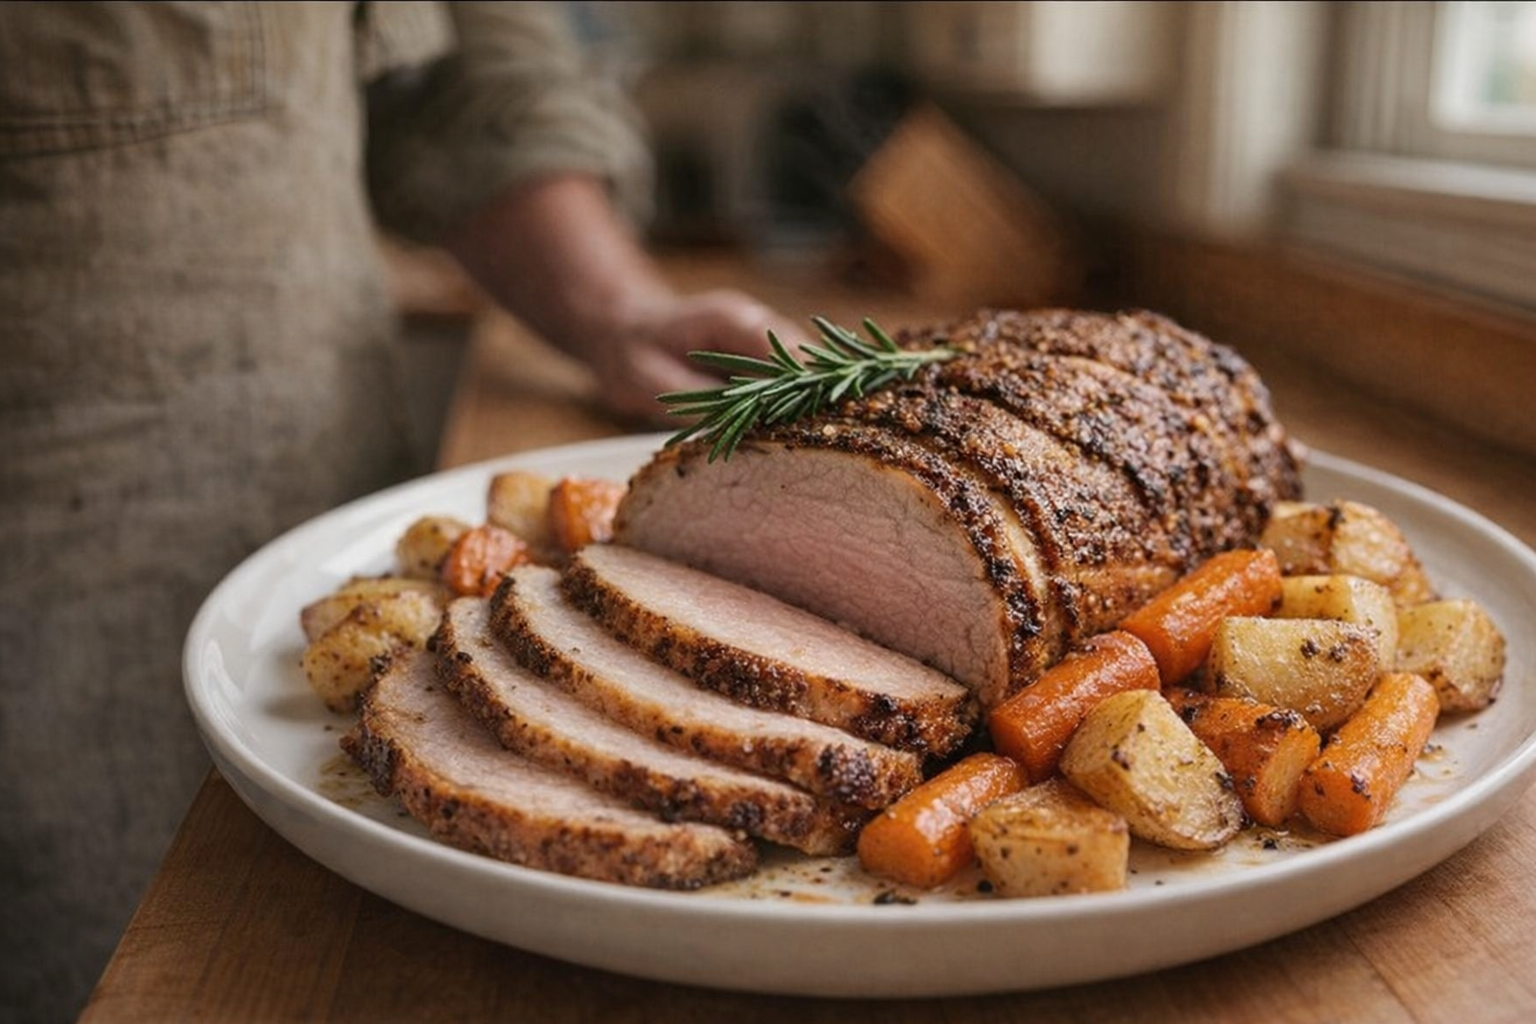
- Rest the Pork: Once the pork reaches the desired temperature, remove it from the oven and transfer it to a cutting board. Tent loosely with aluminum foil and let it rest for 15-20 minutes. This resting period allows the juices to redistribute throughout the meat, resulting in a more tender and flavorful roast.

Cooking Time & Doneness Guide
- Target Internal Temperature: 145°F (63°C) for medium doneness (slightly pink in the center).
- Cooking Time: Approximately 20-25 minutes per pound at 325°F (163°C) after the initial searing at 450°F (232°C).
Visual Cues
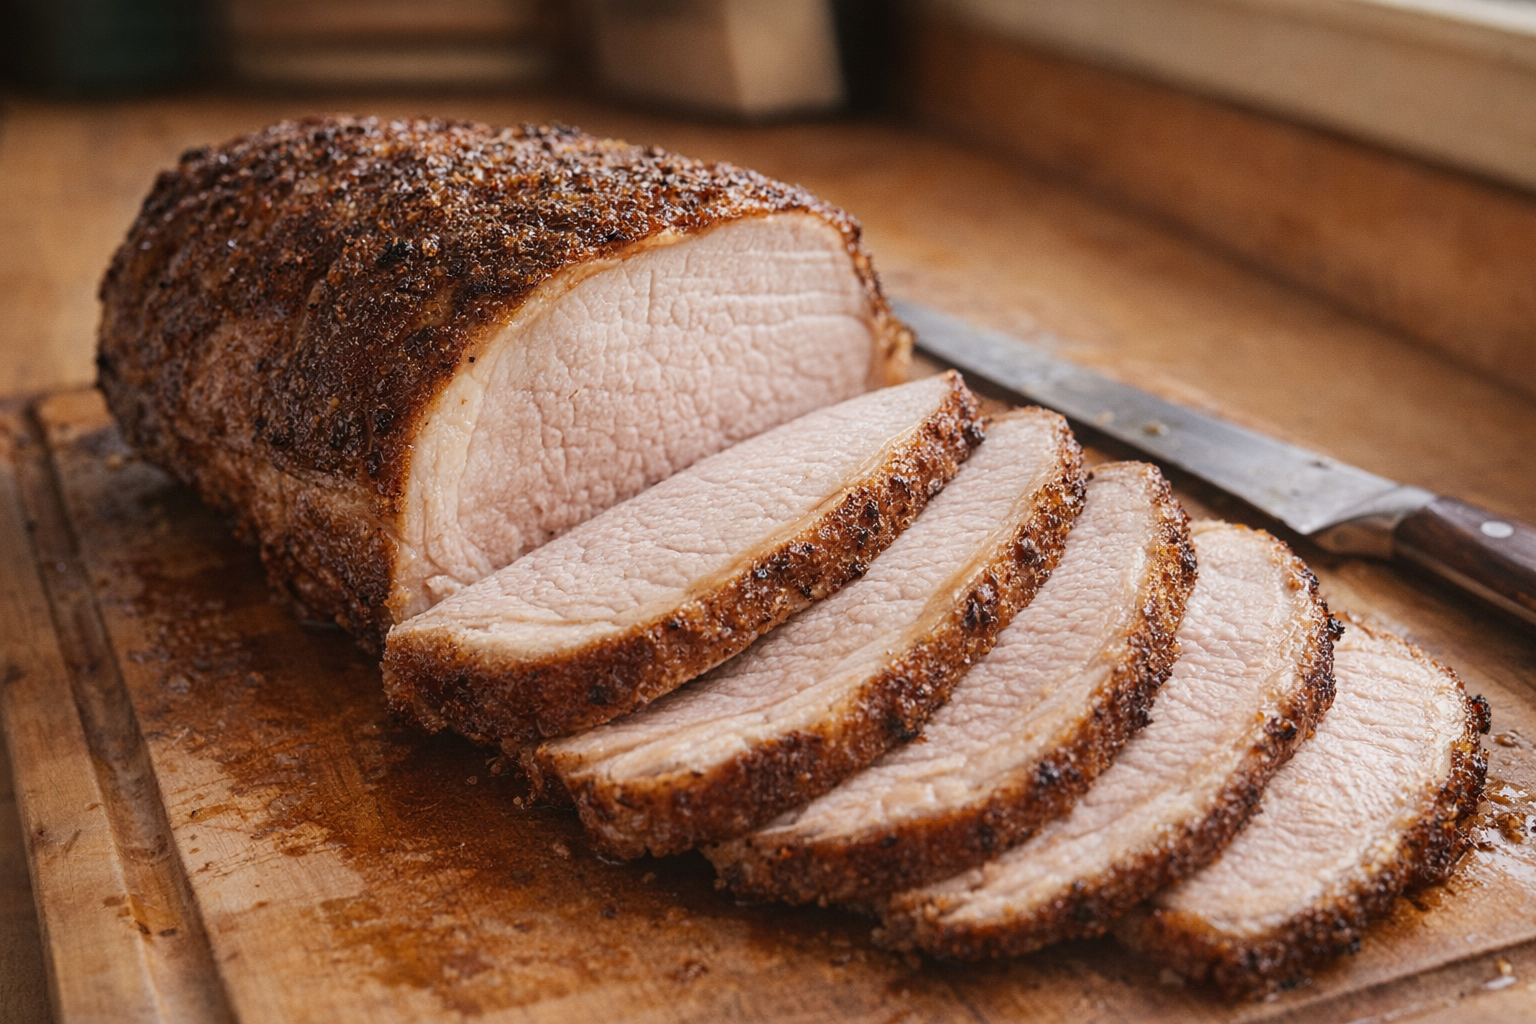
The roast should have a deep golden-brown crust. When you insert a meat thermometer, the juices that seep out should be clear, not pink.
Tips for Perfection
- Don't Overcrowd the Pan: Ensure there's enough space around the roast for air to circulate. Overcrowding can lead to uneven cooking.
- Use a Reliable Thermometer: A meat thermometer is the only accurate way to determine doneness. Don't rely on visual cues alone.
- Don't Skip the Resting Period: This is essential for a juicy roast. Slicing immediately after cooking will result in significant juice loss.
- Check Thermometer Placement: Ensure the thermometer isn't touching bone or fat, which can give a false reading.
Storage & Reheating
- Storage: Store leftover pork roast in an airtight container in the refrigerator for up to 3-4 days.
- Reheating: To reheat, preheat oven to 325°F (163°C). Place the sliced roast in a baking dish with a small amount of broth or water to prevent drying out. Cover with foil and heat until warmed through, about 15-20 minutes. Avoid overheating, as this can make the pork tough.
Serving Suggestions
- As a Sandwich: Slice the pork roast thinly and serve on crusty rolls with your favorite toppings, such as coleslaw, barbecue sauce, or horseradish mayo.
- With Roasted Vegetables: Serve alongside roasted root vegetables like carrots, potatoes, and parsnips for a complete and satisfying meal.
- Over Mashed Potatoes: Create a comforting and flavorful dish by serving slices of pork roast over creamy mashed potatoes, topped with pan drippings or gravy.
- Pork Carnitas: Shred the leftover pork and use it to make delicious carnitas tacos or burritos.
💡 Pro Tips
- Start the roast at a high temperature for the first 15 minutes to create a flavorful, seared crust before lowering the heat to finish cooking.
- Use a meat thermometer to ensure the internal temperature reaches exactly 145°F, preventing the lean pork loin from drying out.
- Allow the meat to rest for at least 10 minutes before slicing to ensure the natural juices redistribute throughout the roast.
- Apply a generous layer of dry rub or salt and herbs to the exterior to enhance the savory crust formed during the initial sear.
- Bring the pork to room temperature by taking it out of the fridge 30 minutes before roasting to promote even cooking from edge to center.
Frequently Asked Questions
While this recipe is optimized for pork loin roast, you can use pork shoulder. However, pork shoulder requires a longer cooking time at a lower temperature to break down the connective tissues, making it tender. Adjust the cooking time and temperature accordingly, aiming for an internal temperature of around 200°F (93°C).
The safe internal temperature for pork is 145°F (63°C), followed by a 3-minute rest. Use a reliable meat thermometer inserted into the thickest part of the roast to ensure accurate reading. Resting allows the juices to redistribute, resulting in a more tender and flavorful roast.
Allow the leftover pork roast to cool completely before storing it in an airtight container in the refrigerator. It's best to use it within 3-4 days for optimal quality and food safety. You can also freeze it for longer storage, up to 2-3 months.
Yes, you can still make the recipe without a roasting pan and rack. You can use a regular baking pan and elevate the roast by placing it on top of thick-cut vegetables like carrots, celery, and onions. This will help with air circulation and prevent the bottom from becoming soggy.