How to Bake Crispy Chicken Wings in Your Oven

The quest for truly crispy oven-baked chicken wings often ends in disappointment. This guide will teach you how to achieve wings with a satisfying crunch on the outside and juicy, flavorful meat inside, all without the mess and extra calories of deep-frying. We're using a combination of simple techniques, readily available ingredients, and precise oven control to deliver restaurant-quality wings from the comfort of your kitchen.
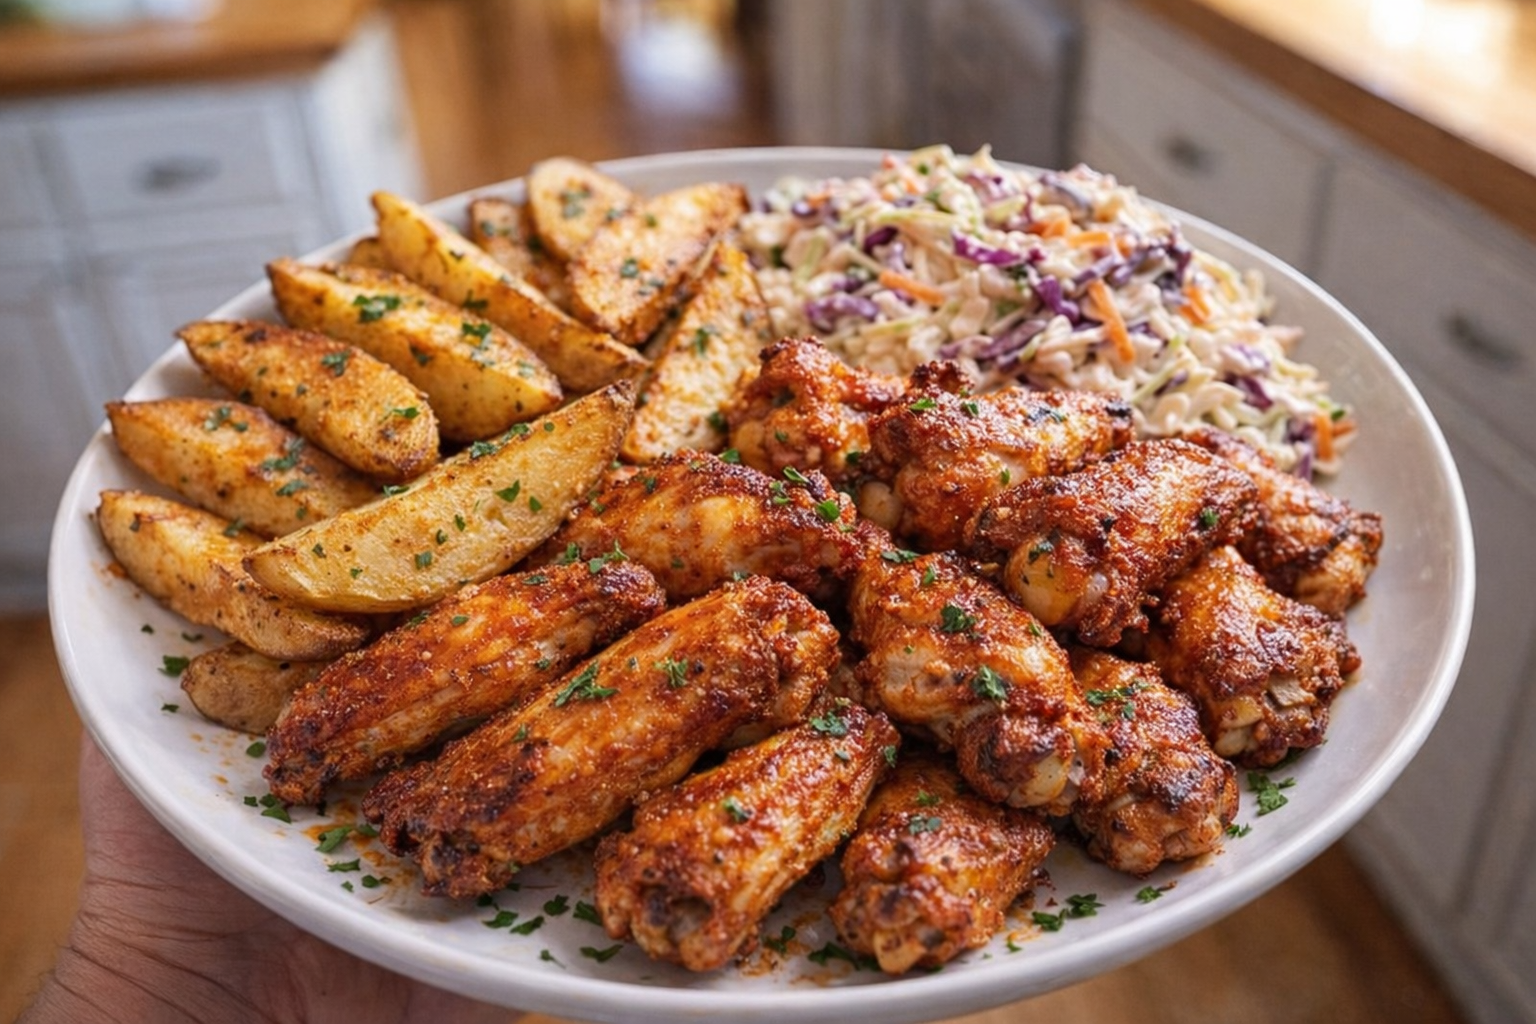
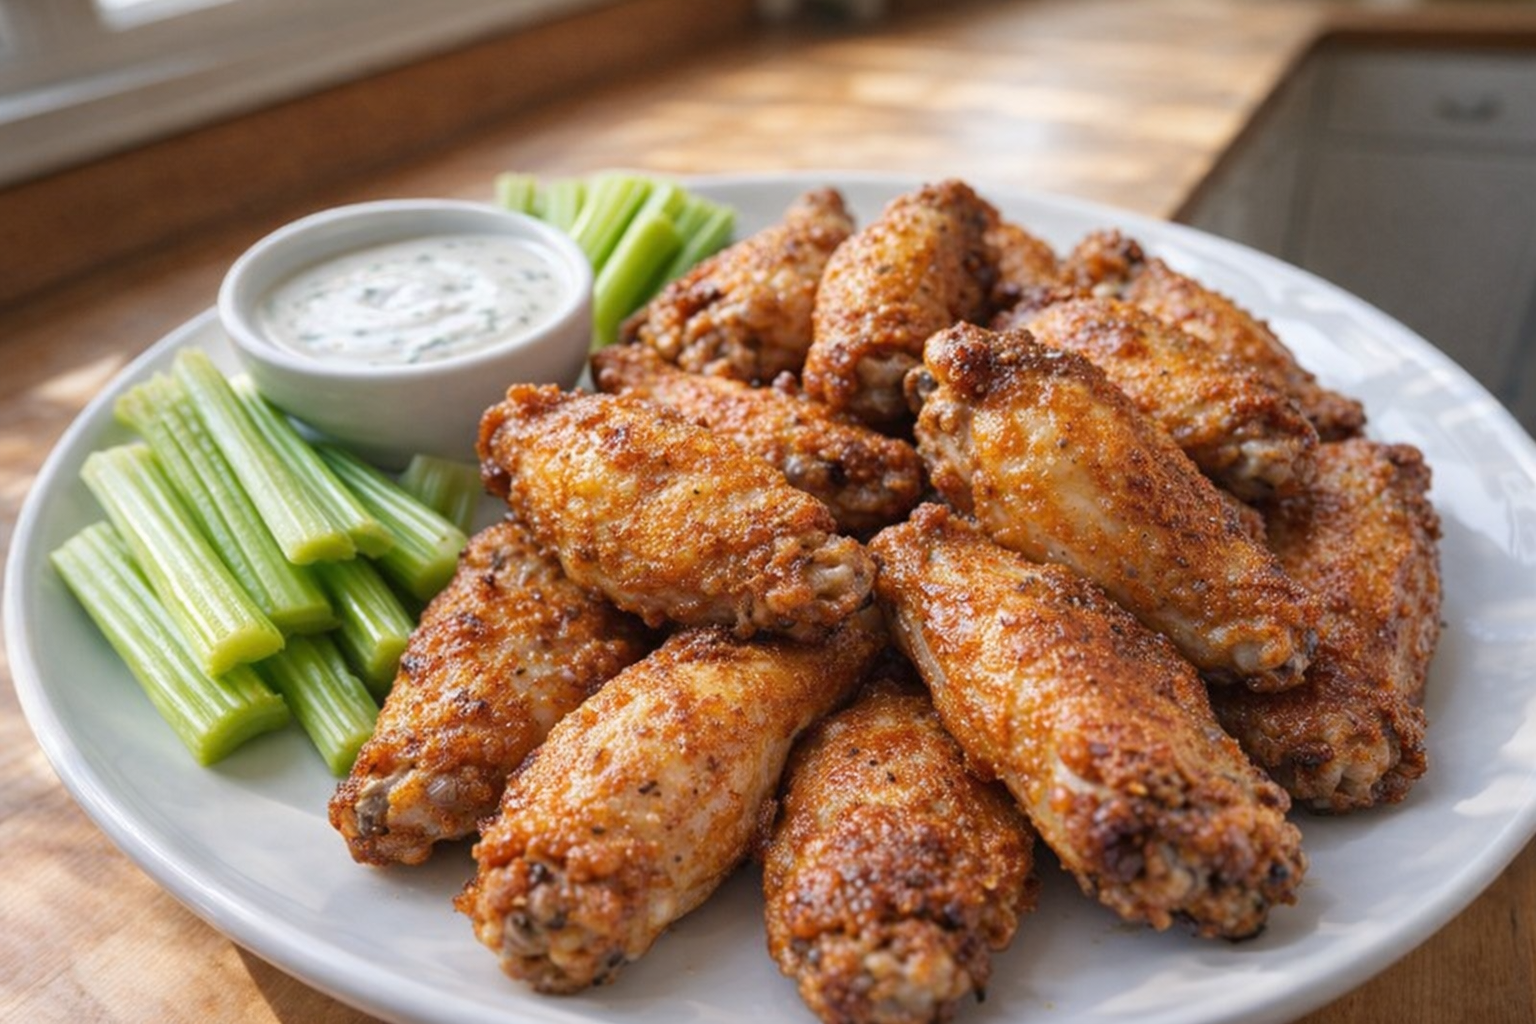
These oven-baked wings offer a classic savory profile enhanced by a smoky paprika and garlic base. The initial butter layer on the baking sheet acts as a flavorful conductor, crisping the skin while keeping the wings from sticking. You'll get chicken wings that are deeply satisfying, perfect as an appetizer, game-day snack, or even a quick and easy meal.
Understanding Chicken Wings
When buying chicken wings, you'll typically encounter three options: whole wings, wingettes (the middle "flat" section), and drumettes (the part connected to the chicken). Sometimes you'll find "party wings," which are already separated into wingettes and drumettes. For this recipe, we recommend using party wings or wingettes. They cook more evenly and offer a higher surface area for maximum crispiness. Look for wings that are plump and have minimal bruising or discoloration. Fresh wings are always best, but frozen wings, properly thawed, work well too.
Why Cook Chicken Wings This Way?
- Versatility: Baked chicken wings can be customized with an endless variety of dry rubs and sauces. From classic buffalo to tangy BBQ, the possibilities are endless.
- Flavor: Baking allows the dry rub to deeply penetrate the skin, resulting in a more intense and complex flavor compared to frying.
- Convenience: No need for vats of oil or messy splatters. Baking requires minimal active cooking time, freeing you to prepare other dishes or simply relax while the oven does its work.
Preparation (Mise en Place)
- Thawing (if using frozen): Place frozen chicken wings in the refrigerator for 24-48 hours to thaw completely. Speed up the process by placing the sealed bag in a bowl of cold water, changing the water every 30 minutes.
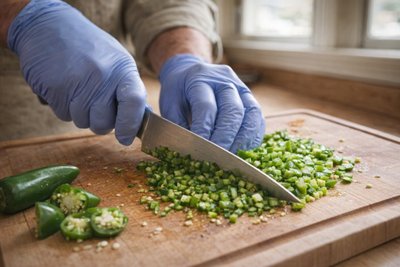
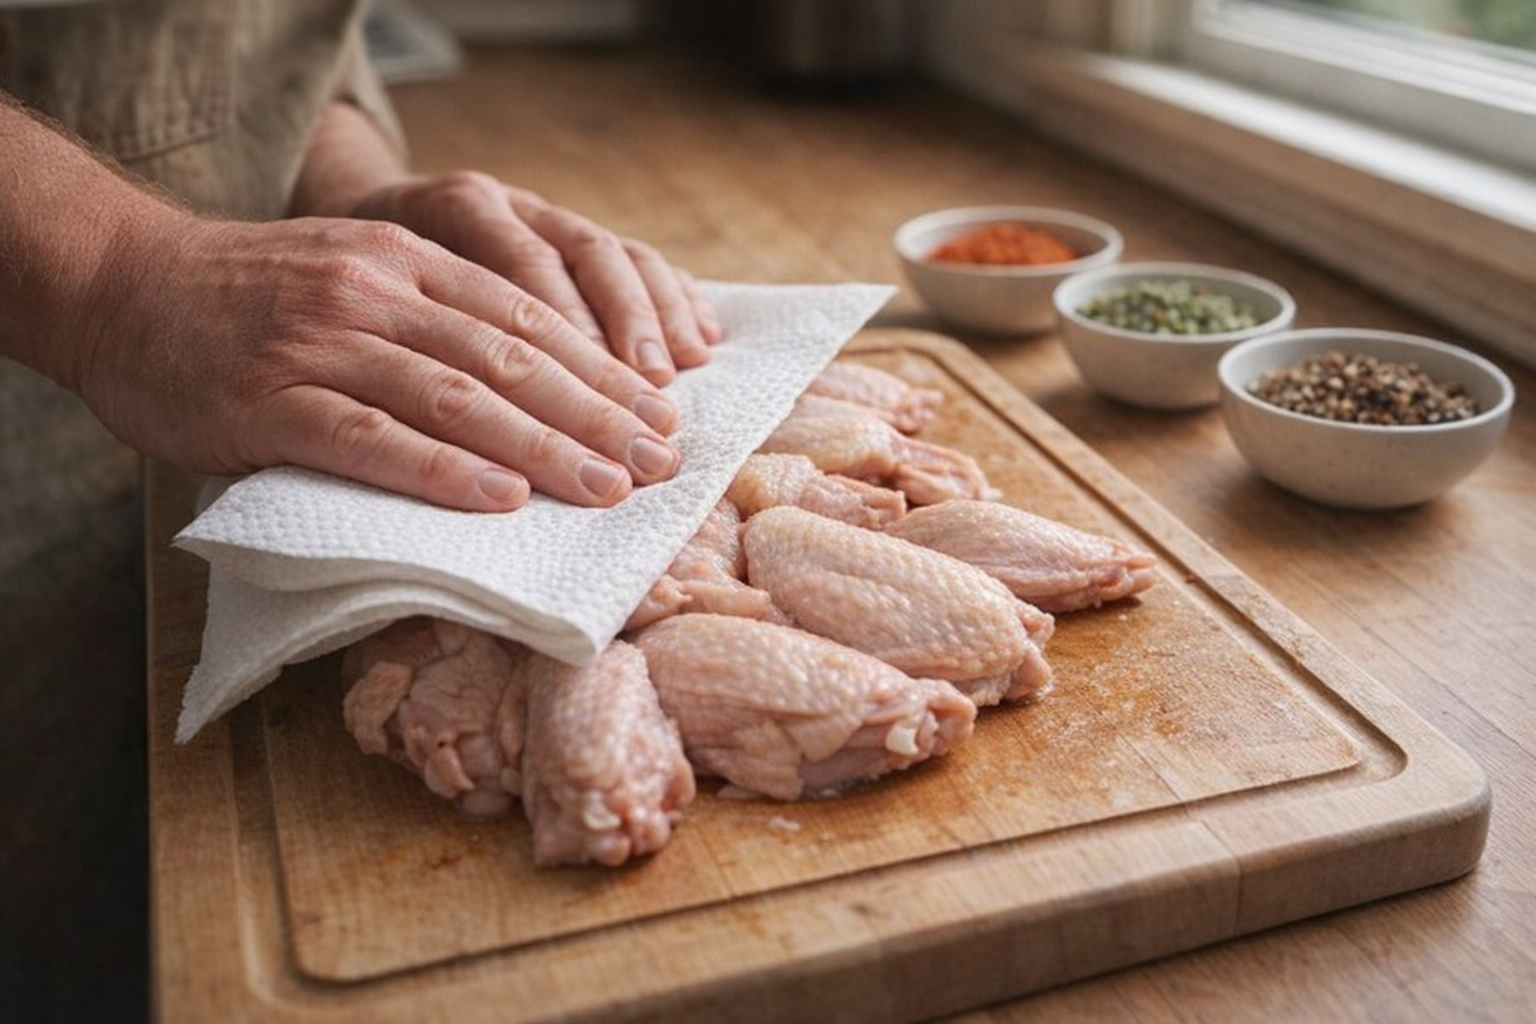
- Patting Dry: This is crucial for crispy skin. Use paper towels to thoroughly pat dry each wing, removing as much surface moisture as possible.
- Butter Prep: Cut the butter into small pats, about 1/2 tablespoon each. This will help it melt evenly on the baking sheet.
Essential Tools
- Large Baking Sheet: A large baking sheet ensures the wings aren't overcrowded, which can lead to steaming instead of crisping.
- Aluminum Foil: Line your baking sheet with foil for easy cleanup.
- Medium Mixing Bowl: For tossing the wings with the flour and seasoning.
- Paper Towels: For drying the wings.
The Cooking Method
This method focuses on achieving maximum crispness through a combination of dry ingredients, high heat, and careful oven management.
Oven Baked Chicken Wings
Ingredients:
- 10-12 chicken wingettes (or party wings), about 2 lbs (900g)
- 3 tablespoons unsalted butter
- ⅓ cup all-purpose flour (40g)
- 2 tablespoons smoked paprika (16g)
- 1 teaspoon garlic powder (3g)
- 1 teaspoon kosher salt (6g)
- 1 teaspoon ground black pepper (3g)
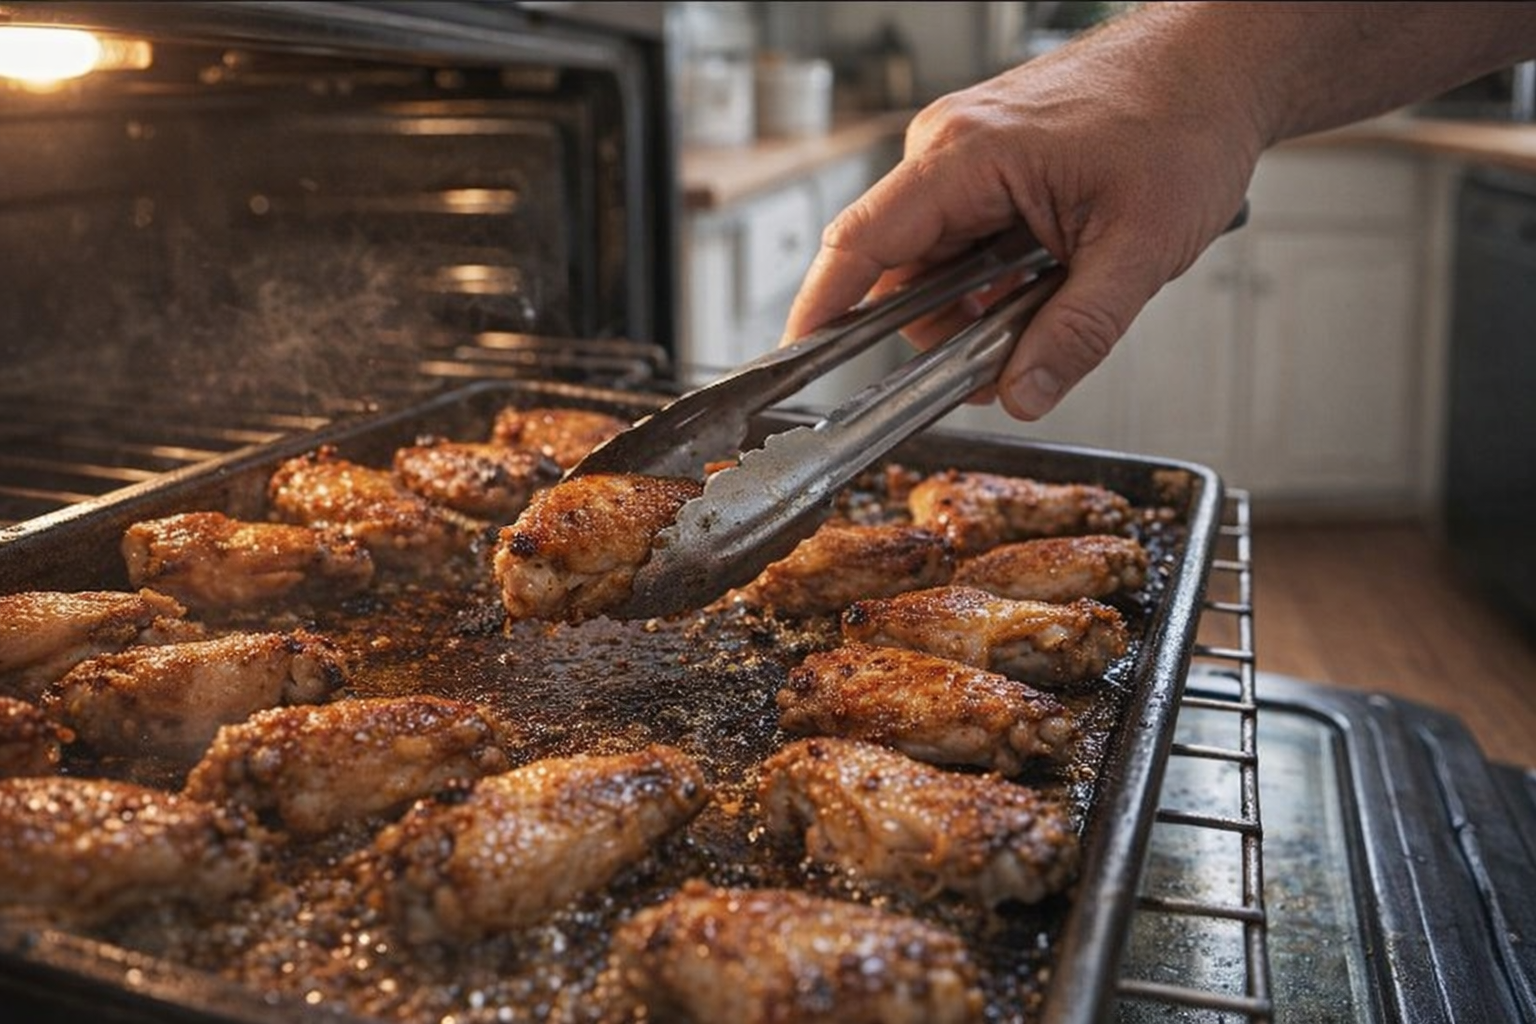
- Preheat your oven to 425°F (220°C). Line a large baking sheet with aluminum foil and distribute the butter pats evenly across the sheet, spacing them a few inches apart. The butter will melt and prevent sticking while adding flavor.
- In a medium-sized bowl, whisk together the flour, smoked paprika, garlic powder, salt, and pepper. Ensure there are no lumps.
- Add the dried chicken wings to the bowl and toss to coat evenly, pressing the flour mixture into the skin to ensure good adhesion. Shake off any excess flour.
- Arrange the wings on the prepared baking sheet in a single layer, making sure they don't touch. Overcrowding will steam the wings instead of crisping them.
- Bake for 30 minutes, then carefully flip the wings. Cook for another 15 minutes, or until the wings are golden brown and crispy. You should hear a sizzle and smell the savory aroma of cooked chicken.
- Let the wings cool for 5 minutes before serving. This allows the juices to redistribute, resulting in more flavorful and tender wings.
Cooking Time & Doneness Guide
- Total Cooking Time: Approximately 45 minutes.
- Internal Temperature: The internal temperature of the chicken should reach 165°F (74°C) when measured with a meat thermometer inserted into the thickest part of the wing.
Visual Cues
The wings should be golden brown and crispy with rendered fat on the baking sheet. The meat should easily pull away from the bone. If you pierce a wing with a fork, the juices should run clear, not pink.
Tips for Perfection
- Don't Skip the Drying Step: This is arguably the most important step for achieving crispy skin.
- Space Them Out: Give the wings enough space on the baking sheet. Avoid overcrowding at all costs.
- High Heat is Key: A high oven temperature is essential for browning and crisping the skin.
- Avoid Opening the Oven Door Frequently: Opening the oven releases heat and can prolong the cooking time.
Storage & Reheating
Store leftover chicken wings in an airtight container in the refrigerator for up to 3 days. For longer storage, freeze the wings in a single layer on a baking sheet before transferring them to a freezer bag. This prevents them from sticking together.
To reheat, preheat your oven to 350°F (175°C). Place the wings on a baking sheet and reheat for 10-15 minutes, or until heated through. You can also reheat them in an air fryer for a similar result. Microwaving is not recommended, as it can make the skin soggy.
Serving Suggestions
- Classic Buffalo Wings: Toss the baked wings in your favorite buffalo sauce for a spicy kick.
- BBQ Chicken Wings: Brush with BBQ sauce during the last 10 minutes of baking for a sweet and smoky flavor.
- Asian-Inspired Wings: Marinate the wings in a mixture of soy sauce, ginger, garlic, and honey before baking.
- Alongside Classic Sides: Serve with celery sticks, carrot sticks, and your favorite dipping sauces like ranch or blue cheese.
💡 Pro Tips
- Pat the chicken wings completely dry with paper towels before seasoning to ensure the skin crisps up rather than steams.
- Apply a thin, even layer of butter to the baking sheet to prevent the wings from sticking and to help fry the skin as they bake.
- Space the wings out in a single layer on the baking sheet to allow for optimal air circulation and even browning.
- Flip the wings halfway through the 30-minute cooking time to ensure a consistent, satisfying crunch on both sides.
- Mix the smoky paprika and garlic base thoroughly into the wings before baking to develop a robust, savory crust.
Frequently Asked Questions
While overnight thawing in the refrigerator is recommended, you can speed up the process by placing the sealed bag of frozen wings in a bowl of cold water, changing the water every 30 minutes. This helps them thaw more quickly and evenly, but make sure they are fully thawed before baking.
While butter adds flavor and aids in crisping, you can substitute olive oil. However, butter contains milk solids which will brown and enhance the crispiness and flavor of the wings, so the results may not be quite as flavorful or crispy with oil alone.
Allow the wings to cool completely before storing. Place them in an airtight container and refrigerate for up to 3-4 days. You can reheat them in the oven or air fryer to restore some of their crispiness.
Make sure the butter is evenly distributed across the baking sheet before placing the wings. Also, avoid overcrowding the pan, as this can create steam and prevent proper crisping. If sticking persists, consider using parchment paper instead of aluminum foil under the butter.